
Complete Guide To Operating Your adam:ONE™
Welcome to adam:ONE™
If you’re reading this you are probably one of the people who take the protection of the people and systems you care about seriously. We’re so glad you’re here!
By now, you (like us), also see that the traditional approach to protecting people online is failing at a rate faster than what solutions can provide. The never ending game of ‘whack-a-mole’ has the traditional security approach in a head- lock.
This only allows us the ability to react to the moves the bad guys make and hope that the people we care about are not the next victims. We’re behind the 8-ball and the gaps increase every day.
Sadly, it’s easier to be bad more than ever, and the bad guys know they can get away with it.
On top of it all, the Internet is going dark (meaning: Internet security gateways have less visibility than ever to what is safe and what is not). Applying yesterday’s solution to tomorrow’s threats is simply crazy to begin with. But watching these solutions crumble to ineffective ghosts of the past puts us all in a very dangerous spot.
It’s only natural that you’re here now. We have to change the game.
Like thousands of other users who are already rewriting the rules of internet security with adam:ONE™, you now also have the power to change the world, one network at a time.
With adam:ONE™ Adaptive White-Listing and Don’t Talk to Strangers (DTTS)™, each one of us now has to power to reset the Internet to be a blank slate; where everything that was bad simply doesn’t exist anymore. No malware. No trackers. No predators. No terrorists or criminals. No exploiters or sexual violators... None of that. And each of us now gets to decide what the Internet is for us and those we protect. We are creating new worlds and new realities for the people we care about.
Welcome to the Bright Web.
We’re so excited you’re here. Welcome to the ADAMnetworks community.
With love,
The ADAMnetworks Team
Living In A Whitelist World | The Bright Web
The power to command the Internet is simply incredible. The best part is that your decisions do not affect anyone that you are not responsible for. Each user on the Bright Web gets a fresh start to decide what the Internet should be for them and the people they protect. It is the ultimate expression of freedom by the protection of healthy constraints. We’re so excited to be able to share this with you.
We affectionately call this place the Bright Web.
The Bright Web is an amazing place. Every user gets to decide what they want the Internet to be. It doesn’t matter that there are millions of bad-guys screaming outside your Bright Web that want to do you harm and violate who and what you value. It doesn’t matter that new malware is being cooked up to steal your finances, or a predator wants to spy on you or that some new worm is born in the dark corners of the Web. If you’re on an Adaptive Whitelist those threats are just not part of what the Internet is for you. And with Don’t Talk to Strangers (DTTS)™ active, you’re putting a lock on the inside of your network too! Nothing evil that might have gotten in gets out.
There are a few things you need to know to step into the Bright Web.
This manual will show you the way.
Table Of Contents
1.0 Installing adam:ONE™ on my system
1.1 Install adam:ONE™ on pfSense®
1.2 Install adam:ONE™ on ClearOS
1.3 adam:ONE™ comes pre-installed on ASUS® routers
2.0 Setting Up your adam:ONE™ Account
3.0 Accessing your adam:ONE™ dashboard
3.1 Setting Up Two Factor Authentication
6.1 Policy (aka Rule Set) defined
8.3 Customizing a Black List policy
8.4 Customizing a White List policy
8.5 Customizing a Schedule policy
9.4 Editing My DNS Filtering Treatment
11.1 Identifying Devices in your dashboard
11.3 Assigning Devices to Policies
11.4 Allow A Device To View Logs
11.5 Viewing The Logs Of My Network
11.6 Handling Unblock Requests
13.1 Adding A User To My Account
13.4 Changing My Network Settings
13.5 Changing My Billing Information
13.6 Upgrading My Account After My Free Trial
Allow Support To Access My Router
14.2 My Network Advanced Settings
15.2 Choosing My Reporting Dates
16.0 Common Issues | Troubleshooting
16.1 I Need Access To A Site I Can’t Get To - I’m being blocked!
I’m Being Blocked By A Blacklist Policy Rule Set
16.2 Improper Network Setup - My filtering isn’t working
16.4 How Do I Make Sure Psiphon Is Blocked?
16.5 Free Video Tutorials
1.0 Installing adam:ONE™ on my system
1.1 Install adam:ONE™ on pfSense®
- Pre-installed - shop here
- Self-install - instructions here
1.2 Install adam:ONE™ on ClearOS
1.3 adam:ONE™ comes pre-installed on ASUS® routers
2.0 Setting Up your adam:ONE™ Account
Setting up your adam:ONE™ account is simple.
- Go to www.adamnet.works
- Click on Dashboard Login button

- Click on the Sign up link
- This will take you to https://dashboard.adamnet.works/signup
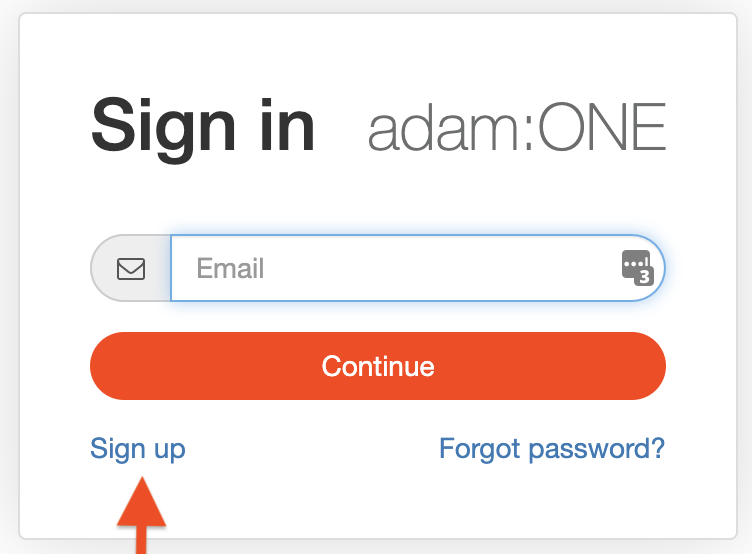
- Enter in the information asked for and click Send Confirmation Email
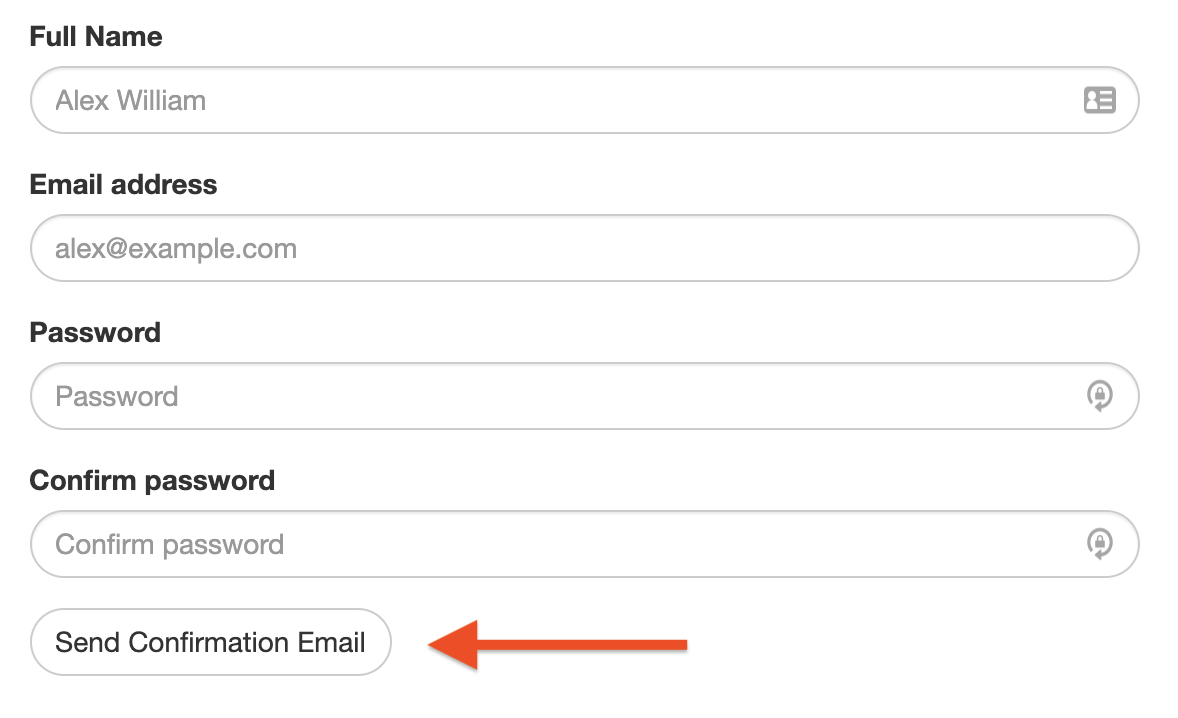
- This will create an account and send a confirmation email to your email inbox.
- Click on the link in the email we send you.
- That will open a webpage where you’ll enter in your BOX ID.
- This information then gets stored in your DASHBOARD > Router for future reference
3.0 Accessing your adam:ONE™ dashboard
Access your adam:ONE™ dashboard in one of two ways:
- From our website - https://adamnet.works -> then click on Dashboard Login, or
- From the MyTools page URL - http://mytools.management -> then click on Dashboard
3.1 Setting Up Two Factor Authentication
As each user on your account will need to set up two factor authentication, we recommend that your adam:ONE™ Account Administrator help them set this up and show them how to manage their profile.
Note:
To set up Two Factor Authentication for your account you will need a security key.
Here are the steps to enable two factor authentication per user profile:
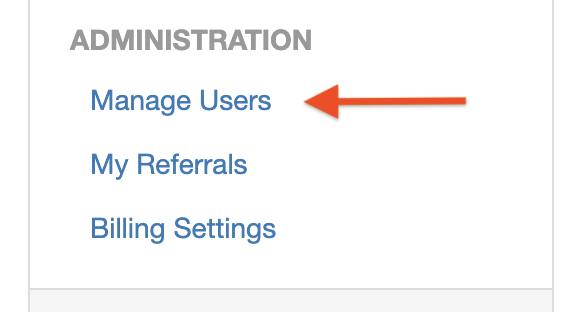
- Click on the Manage Users tab under Administration in the main menu
- Click on the Manage My Profile button
- Under the Security Credentials section, click on the Register Security Key button

- Give your security key a name
- Click Continue
- Authenticate your key as instructed. You may need to allow your key to be seen. If so, just click Allow.
- Click on Enable 2-step Verification
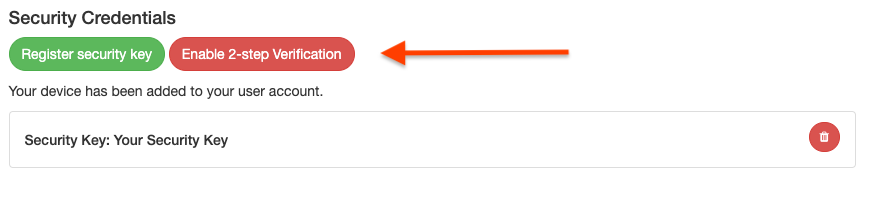
- Your account will now have two factor authentication.
Note:
You will need to insert your key after entering your username and password each time you sign into your account.
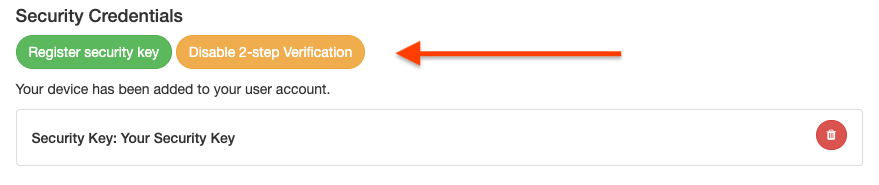
Should you want to disable two factor authentication, simply click on the button Disable 2-step Verification under Security Credentials in your profile.
If you need to delete a security key, click on the Trash Can symbol beside the security key listed. You will be prompted to ensure you want to delete the key. Click OK to confirm your deletion.
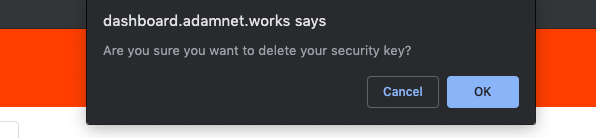
Your security key will be deleted and the two factor authentication associated with that security key will no longer be active.
Simply follow the steps above to re-activate your two factor authentication with the same or new key.
4.0 My Profile
4.1 Change Login Name
When you log into your profile you’ll notice that there are several login credentials that you can edit. The first is your Login Name.
To change your login name simply type in the box provided and click save. Your Login Name is used for display purposes on your account and for personalization when we email you about your adam:ONE account. Use whatever name you would like to be referred to by other users on your account and by us here at ADAMnetworks.
4.2 Change Login Email
LIke changing your login name, simply enter in your new email address in the box provided. We use this Login Email to send any emails to you as an adam:ONE Account User.
Note
A notification will be sent to both the old and new addresses regarding the change of email address.
4.3 Change Current Password
To change your current password check the change password box.

This will open the section. Here you will need to enter in your current password, your new password and confirmation of that new password. Once done click save. This new password will now be used during login.
If you forget your password on login, simply click on the Forgot Password link.
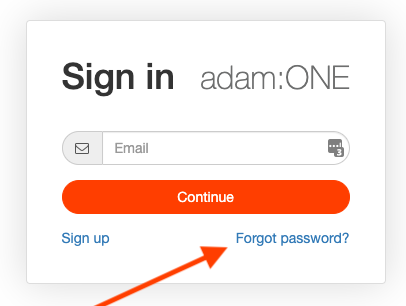
This will prompt you to enter your email address. We will send you a confirmation email to change your password. Simply, follow the instructions in that email to reset your password.
4.4 Two Factor Authentication
Within your profile you’ll find Two Factor Authentication settings. For detailed instructions on setting this up, see Section 3.1 of this guide.
5.0 How to use adam:ONE™
After adam:ONE™ is installed as your security gateway, it will automatically discover any device that tries to connect to the internet through it. Devices will instantly benefit from a built-in default filtering Policy called “Block the bad.” To customize the access and security level of your online devices, follow these two basic principles:
- Setup Your Policies for your network
- Use either an adam:ONE™ pre-built policy or create your own policies
- Assign each device to its corresponding policy.
To start, let’s further explore how policies work. Afterwards, we’ll find out how to identify the online devices in your adam:ONE™ network.
6.0 About Policies
6.1 Policy (aka Rule Set) defined
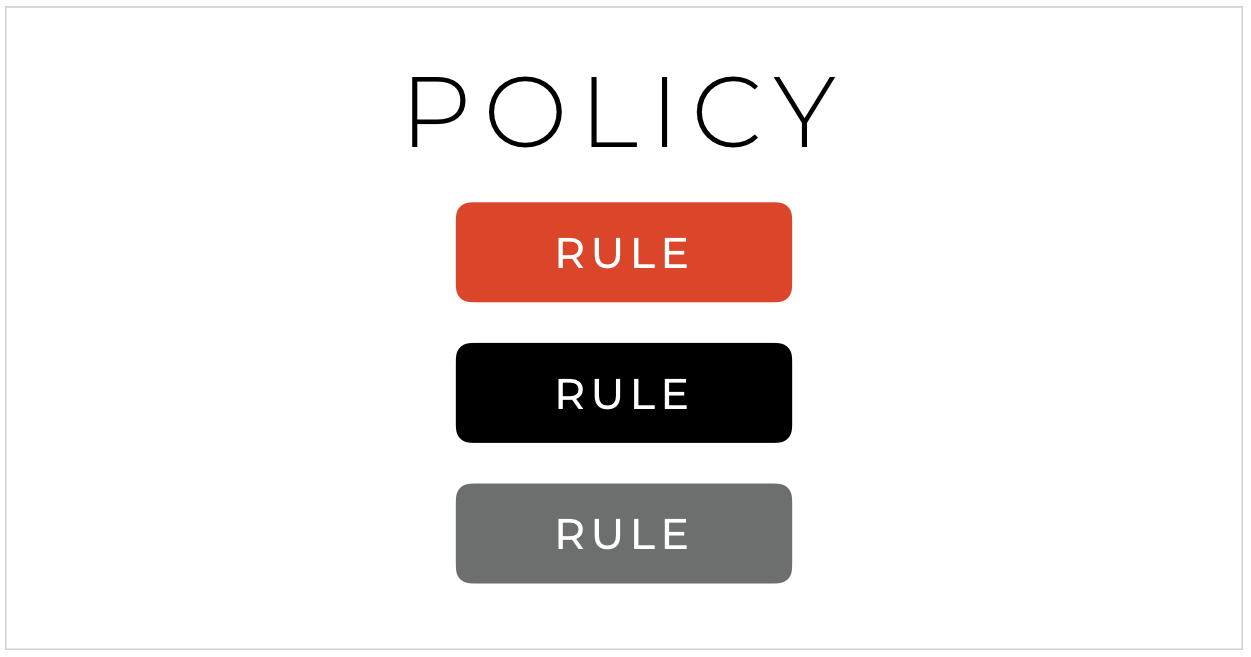
In simplest terms, an adam:ONE™ policy is an aggregation of Rules.
Devices connected to the internet through adam:ONE™ are forced to comply with each Rule “turned ON” within a policy. As a result, the policy governs the level of online access for any devices that are assigned to it. More on Rules here.
6.2 Default Policy defined
When a device joins your network for the first time, it will be automatically assigned to the policy tagged as the DEFAULT policy. You can select any policy to be the default policy that all new devices join when they connect to your network, ranging from no access to full access.
- When you first click on the Policy tab in your dashboard, the Default Policy is displayed.
- To change any of your policies to your Default Policy, simply click the Default button beside the policy name, when you have that policy in view.

6.3 Types of Policies
There are four types of policies you can assign a device to:
- White List (the most secure)
- Black List (less secure)
- Unfiltered (not recommended)
- Schedule (automated policy switching based on date and time)
Please note the corresponding symbol used for each type of policy in the image below.

6.4 White List policy defined
Whitelisting methodology = Deny All ~ Allow Some
A White List is the most secure type of policy. It blocks access* to the whole internet except for websites and domains that have been pre-approved by you.
*Note
Access in this case is DNS-based access. For increased online security, we strongly recommend also using DTTS™ (Don’t Talk To Strangers™ - a Business and MSS / MSS+ Plan feature) which also blocks all unauthorized IP-to-IP only traffic.
6.5 Black List policy defined
Blacklisting methodology = Allow All ~ Deny Some
A Black List is a common but less secure type of policy. It allows access to the whole internet except for a list of websites and domains that you deny or are known to have a negative reputation.
6.6 Unfiltered policy defined
An Unfiltered policy grants full access to the internet. This policy is NOT recommended.
6.7 Schedule defined
A Schedule allows devices to switch between policies automatically depending on the day of the week and time of day.
7.0 About Rules
7.1 Rule defined
In simplest terms, a Rule acts as an on/off switch which allows or denies a defined level of access to the internet. Rules are further defined below:
7.2 Types of Rules
There are seven types of Rules that you can turn ON or OFF within a policy. You’ll notice six types of symbols allocated to the start of each Rule to help identify their purpose:
Rule Type | Purpose | Applicable Policies | Authority Level - will overrule the following Rules: | |
Black List | Block access to the domain names listed | White List Black List | White Lists System Filters | |
White List | Allow access to the domain names listed | White List | none | |
Forwarding List | Bypass a policy’s DNS forwarder and specify a unique DNS forwarder for the domain names listed | All | All | |
Authoritative Entry | Bypass all rules and DNS forwarders and send domain names on list directly to IP address specified | All | All | |
Filter Lists | Varies. Depends on site support. Usually used to filter the content of a website. | White List Black List | n/a | |
Enabler | Allow access to IP and Port Ranges otherwise blocked by DTTS™ | All | n/a |


8.0 Working with Policies
8.1 Viewing Policies
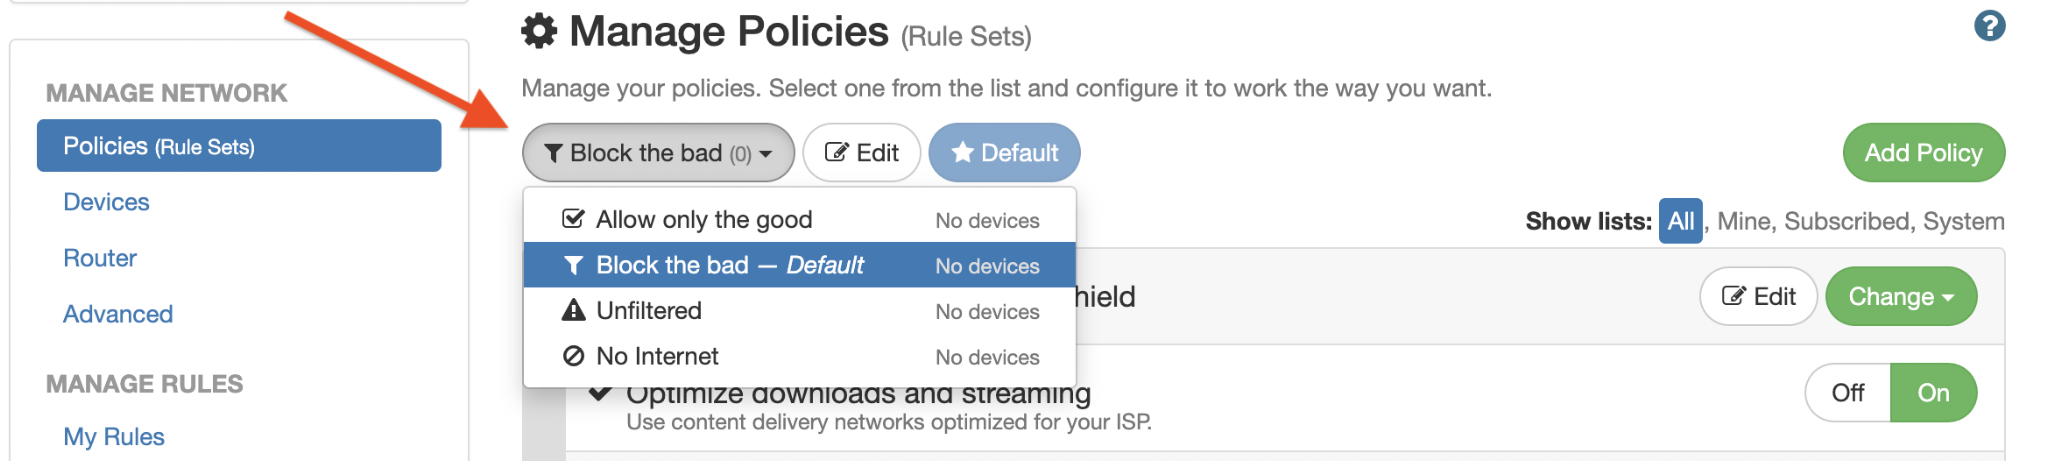
To view your Default Policy -> sign in to your dashboard -> click on Policies
The Policies tab always displays your Default Policy.

To view all other policies -> sign in to your dashboard -> click on policies -> click on the name of your default policy -> then select the policy you wish to view from the dropdown menu that appears.
To quickly identify and work with the Rules in your policy, select one of the following source filters:
- SYSTEM - adam:ONE™ generated and managed Rules
- SUBSCRIBED - adam:ONE™ and peer managed list of domain names
- MINE - your own personally managed list of domain names

To help you get started, your dashboard comes with the following two pre-built policies:
- a Black List type policy named “Block the bad,” and a
- a White List type policy named “Allow only the good.”
8.2 Adding New Policies
To add new polices: from the Policies tab -> click on Add Policy -> select the type of policy preferred -> name your policy -> click on Create Policy, -> then View Policy to make changes to it.
8.3 Customizing a Black List policy
A Black List policy can be modified in the following two ways:
- Select which system managed rules to turn on or off, or
- Create and add your own personal black list rules - see My Rules
Note
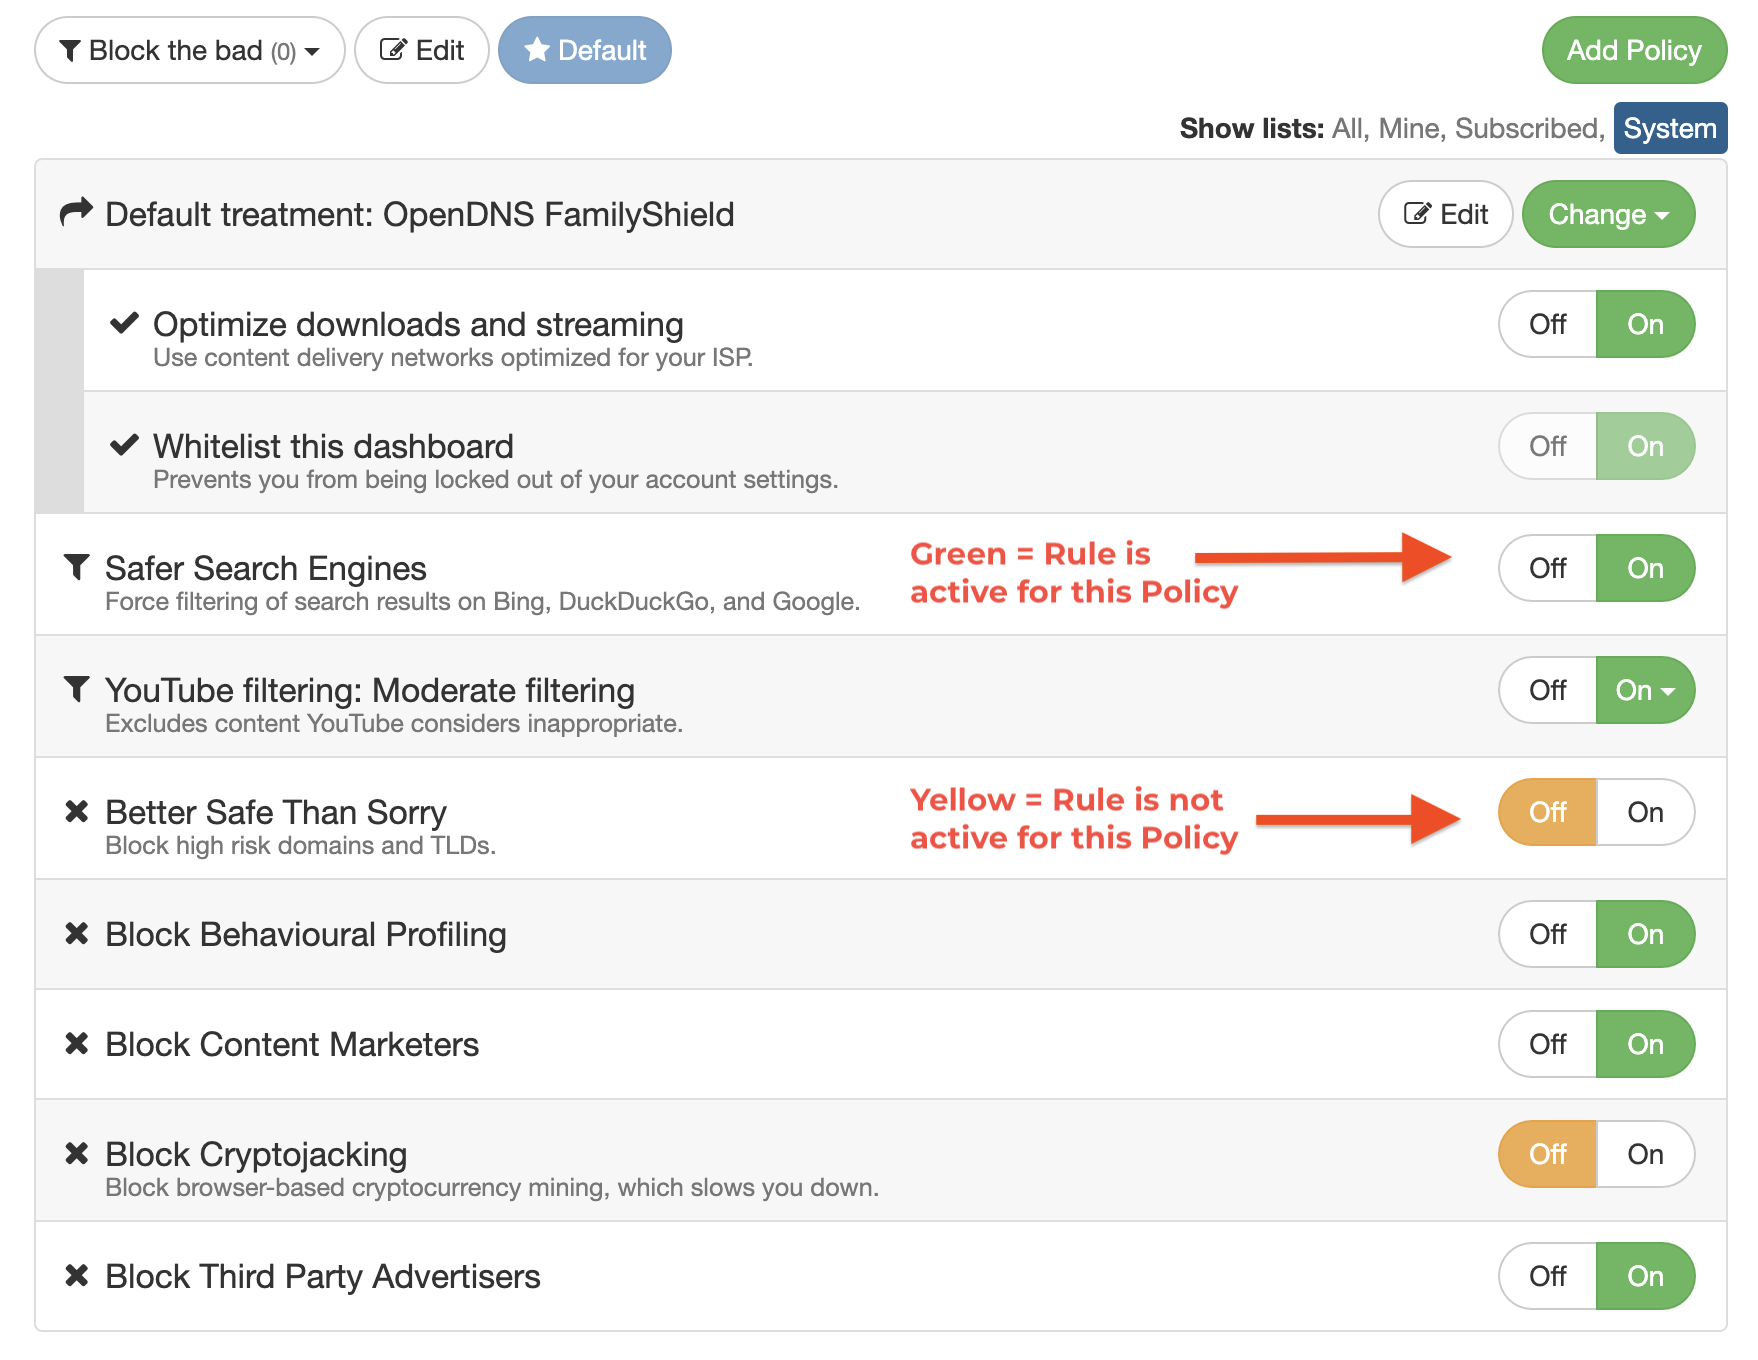
When you first view the pre-built “Block the bad” policy, you may notice a few SYSTEM managed Rules turned to the Off position indicated by the word “Off” highlighted in yellow. To turn these Rules ON (recommended), simply click the “On” side of the switch which will then be highlighted in green. When a switch is green (On), it means that Rule is now active within the policy.
8.4 Customizing a White List policy
A White List policy can be modified in the following two ways:
- Subscribe to system managed white lists and then turn them on within the applicable policy - see Subscriptions,
- Create and add your own personal black list or whitelist rules, see My Rules,
8.5 Customizing a Schedule policy
A Schedule allows devices to switch between policies automatically depending on the day of the week and time of day.
To set up a schedule follow these simple steps:
- Review Working With Policies and Adding New Policies.
- Create a New Schedule Policy
- Choose the Policy for times with no schedule using the dropdown menu
- This will set the default policy for the schedule. This will be used for any block that you don’t define using the method laid out below.
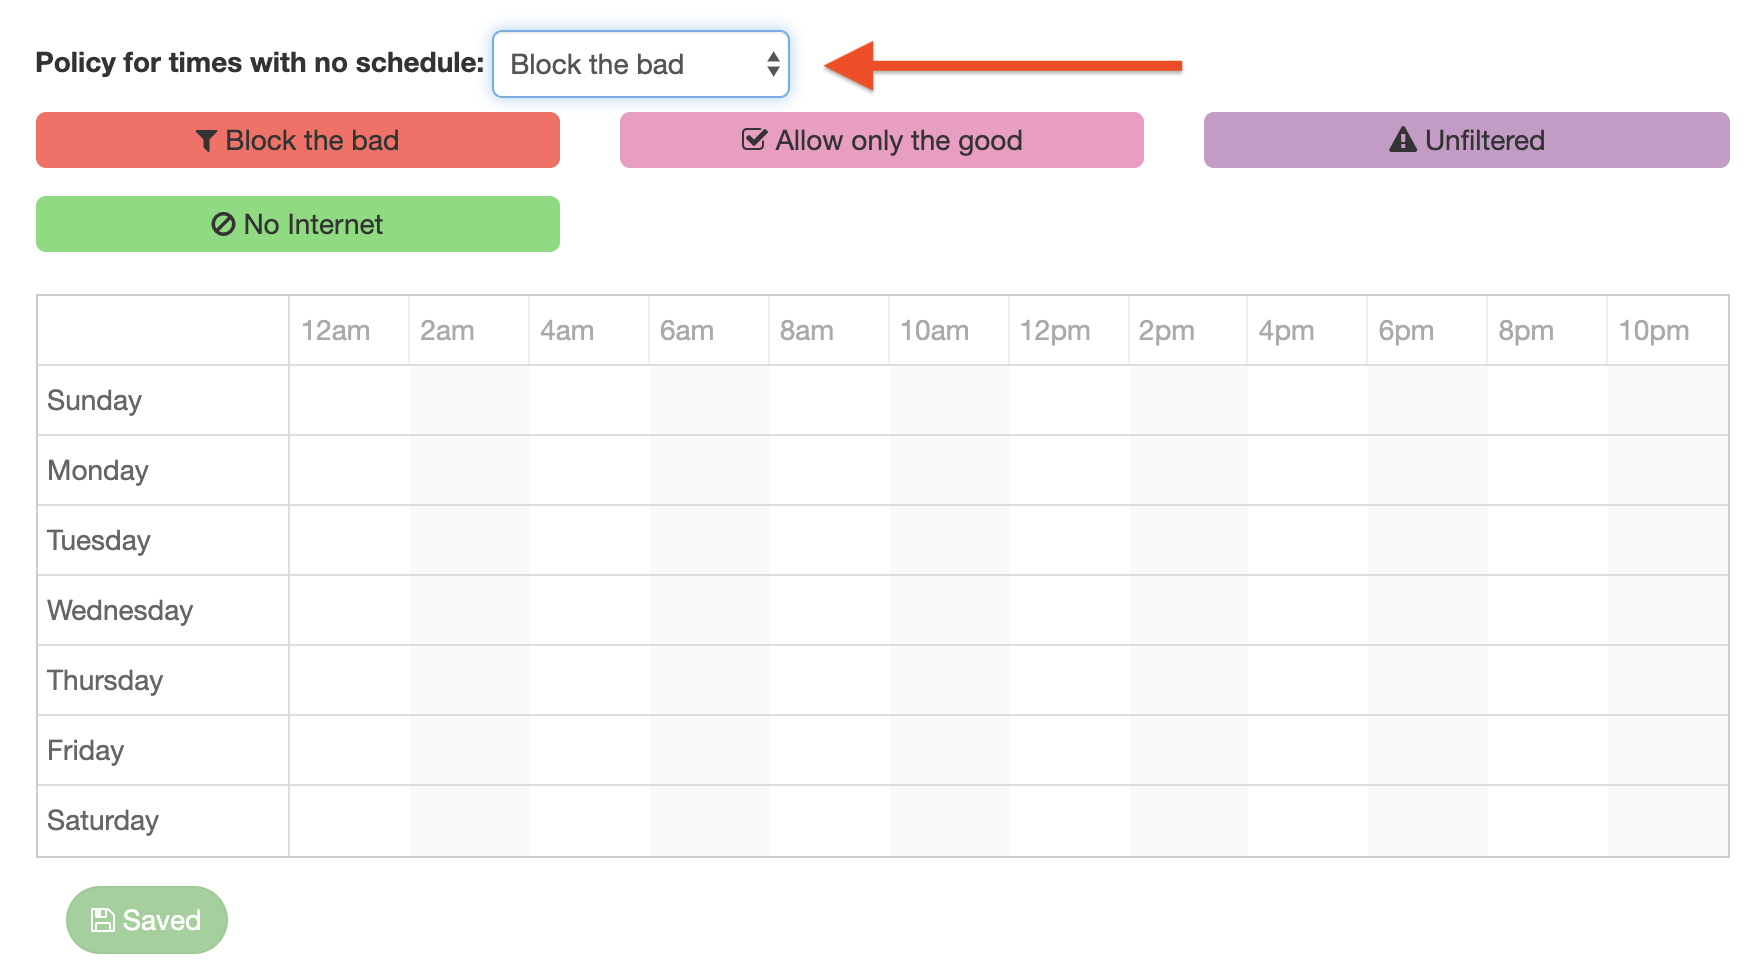
- Click anywhere on the timeline to begin setting your schedule
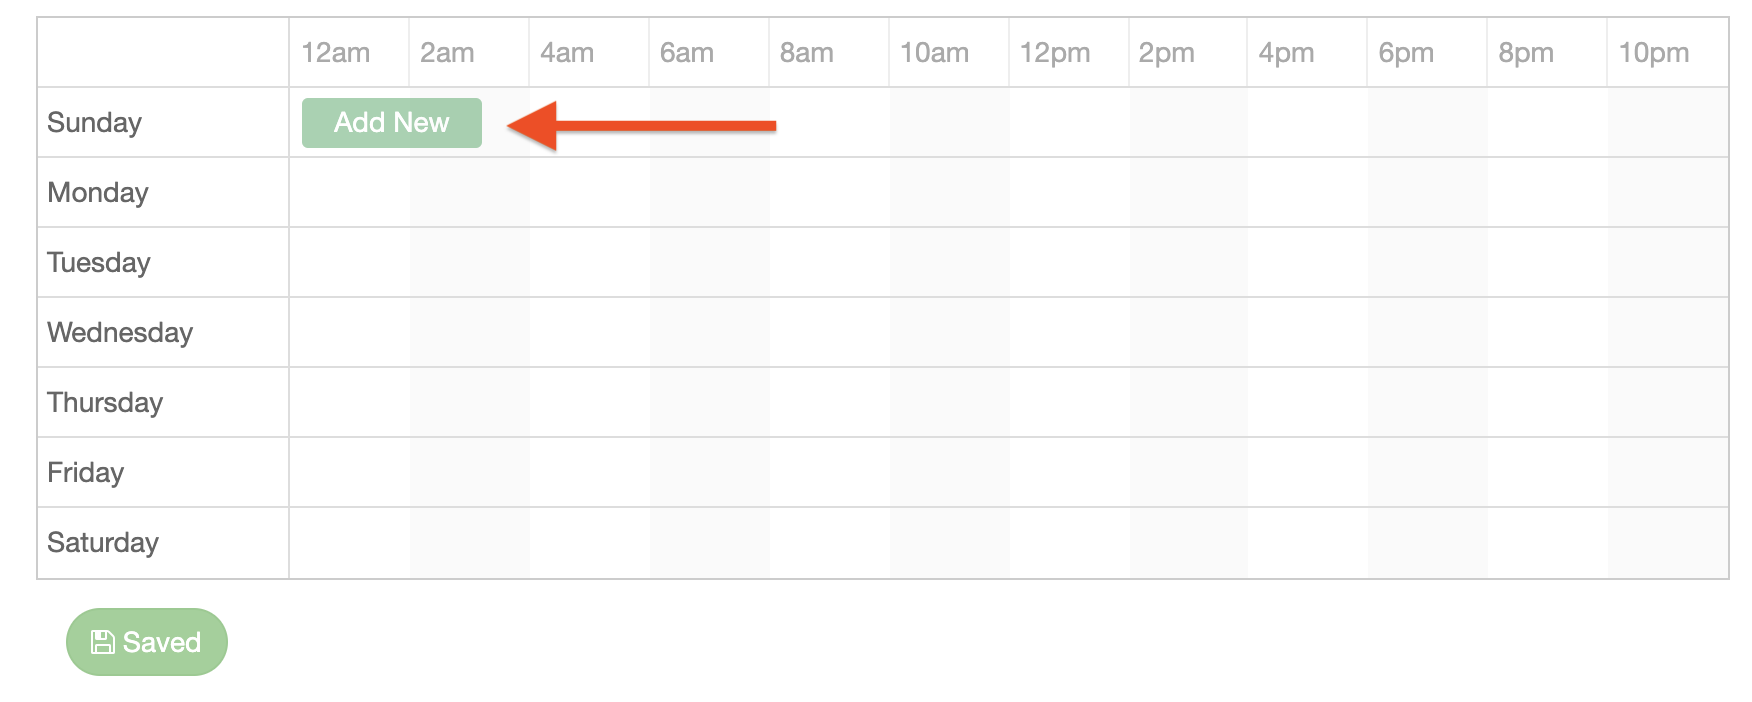
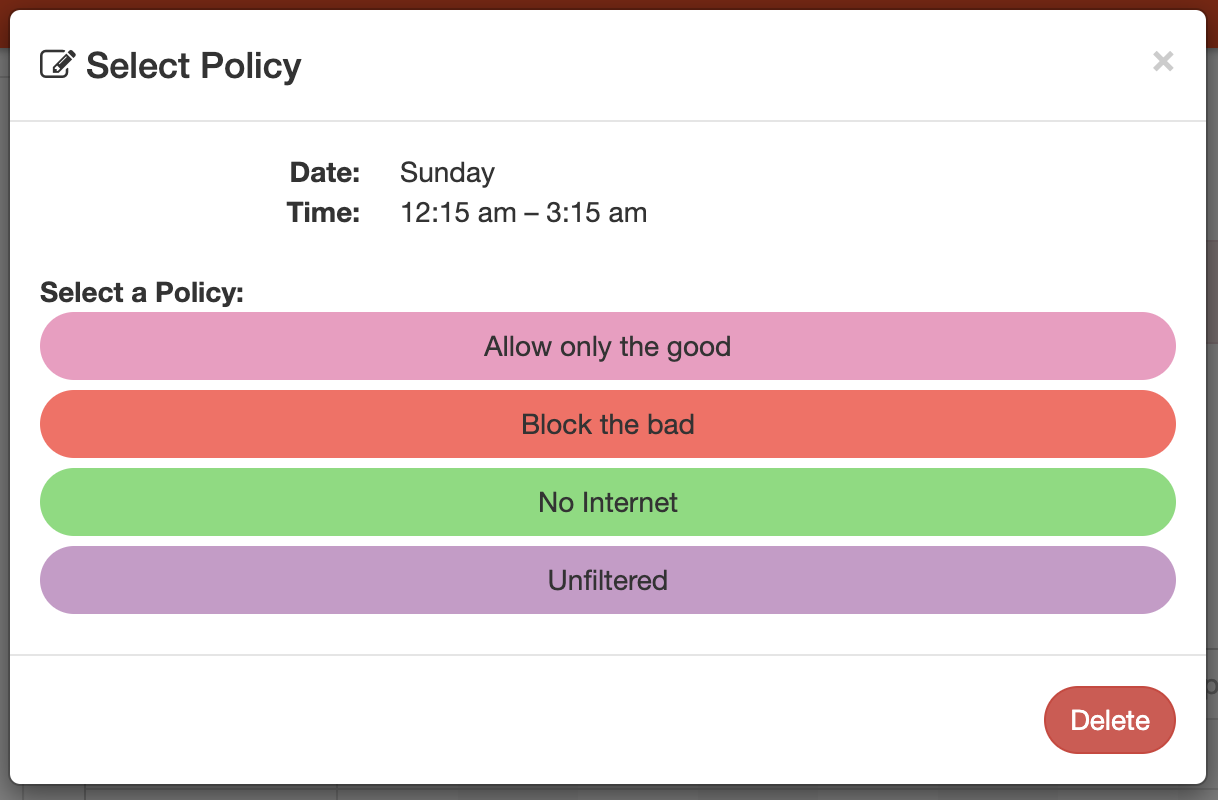
- In the dialogue box that appears choose the policy you’d like to apply to that time block
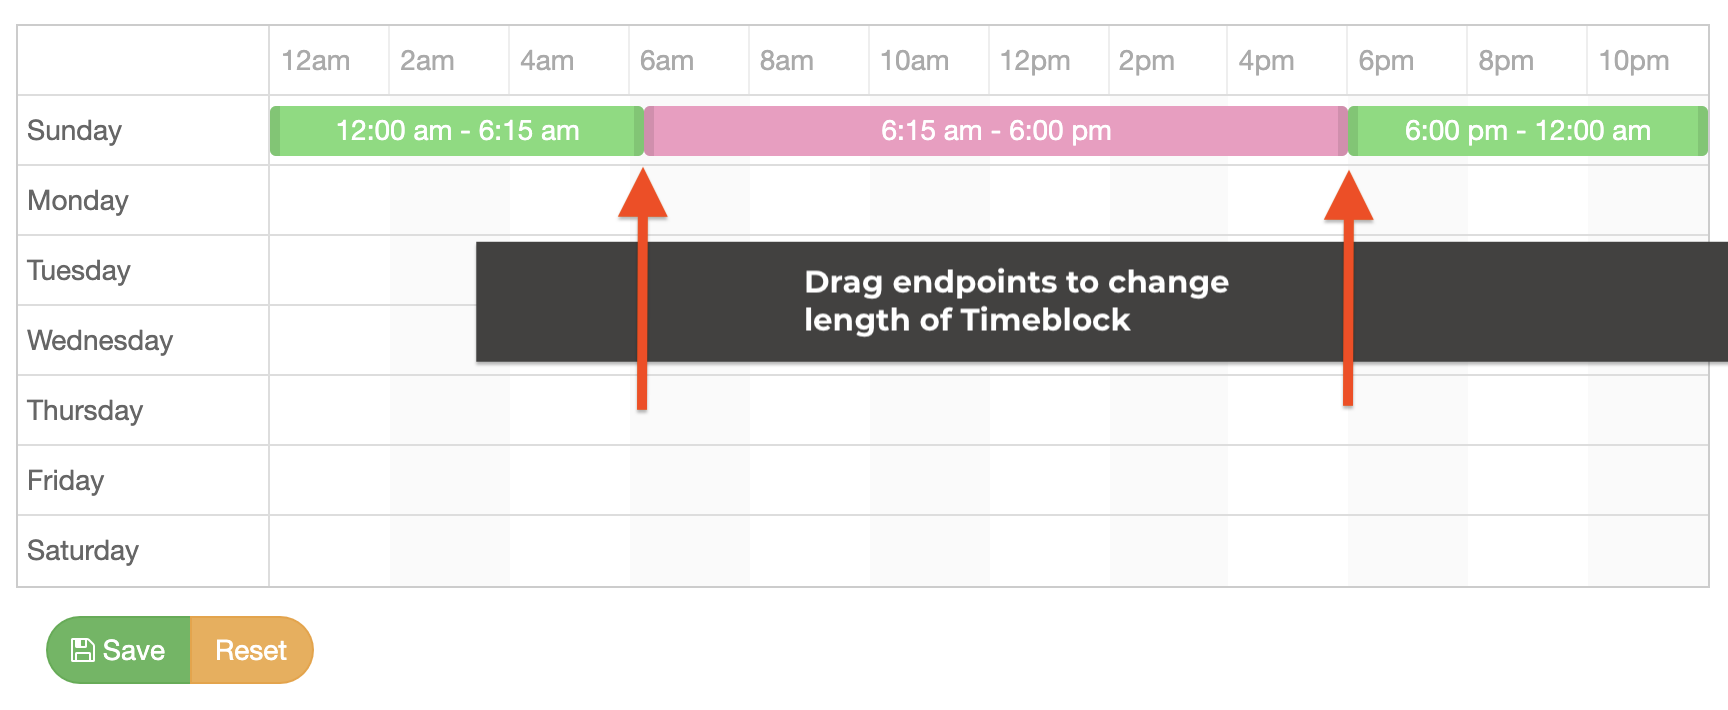
- Then drag the box to the appropriate time
- You can shorten or lengthen the time by dragging the front or back end of the time block
- If you want to delete the time block or change the policy, simply click on the time block and re-select the new policy or click Delete in the dialogue box that appears.
That’s all there is to it. Now the devices you assign to this Schedule Policy will switch between the policies you chose at the appropriate times for each day.
9.0 Managing My Rules
In setting up your rules there are three specific types available.
- Lists
- Enablers
- DNS Forwarders
You’ll find the links to each set of rules available at the top of the page in the My Rules section of your dashboard. Simply click on the appropriate link and then follow the steps below for the rule you’d like to create.
9.1 My Lists
Navigate to the My Rules tab from the Main Menu Dashboard.

To create your own lists follow these steps:
- Click on the New List button at the top of the page to create a new list.

- Give your list a name that is easy to recognize, like "Block videos".

- White List: These are sites that are allowed on policies with the white list filtering mode.
- Black List: These are sites that are blocked when using black list mode.
- Forwarding List: This is an advanced feature recommended only for system administrators. This specifies an alternate DNS server that will be used only for these specified domains.
- Authoritative Entry: These rules bypass all rules and DNS Forwarders sending domain names on your list directly to IP addresses you specify.
- Click Create List
- List all the domains you’d like on your list
- One domain per line in the box provided, for example:
- youtube.com
- Vimeo.com
- Check Include subdomains if you wish to add all subdomains associated with the root domain your entered in your list.
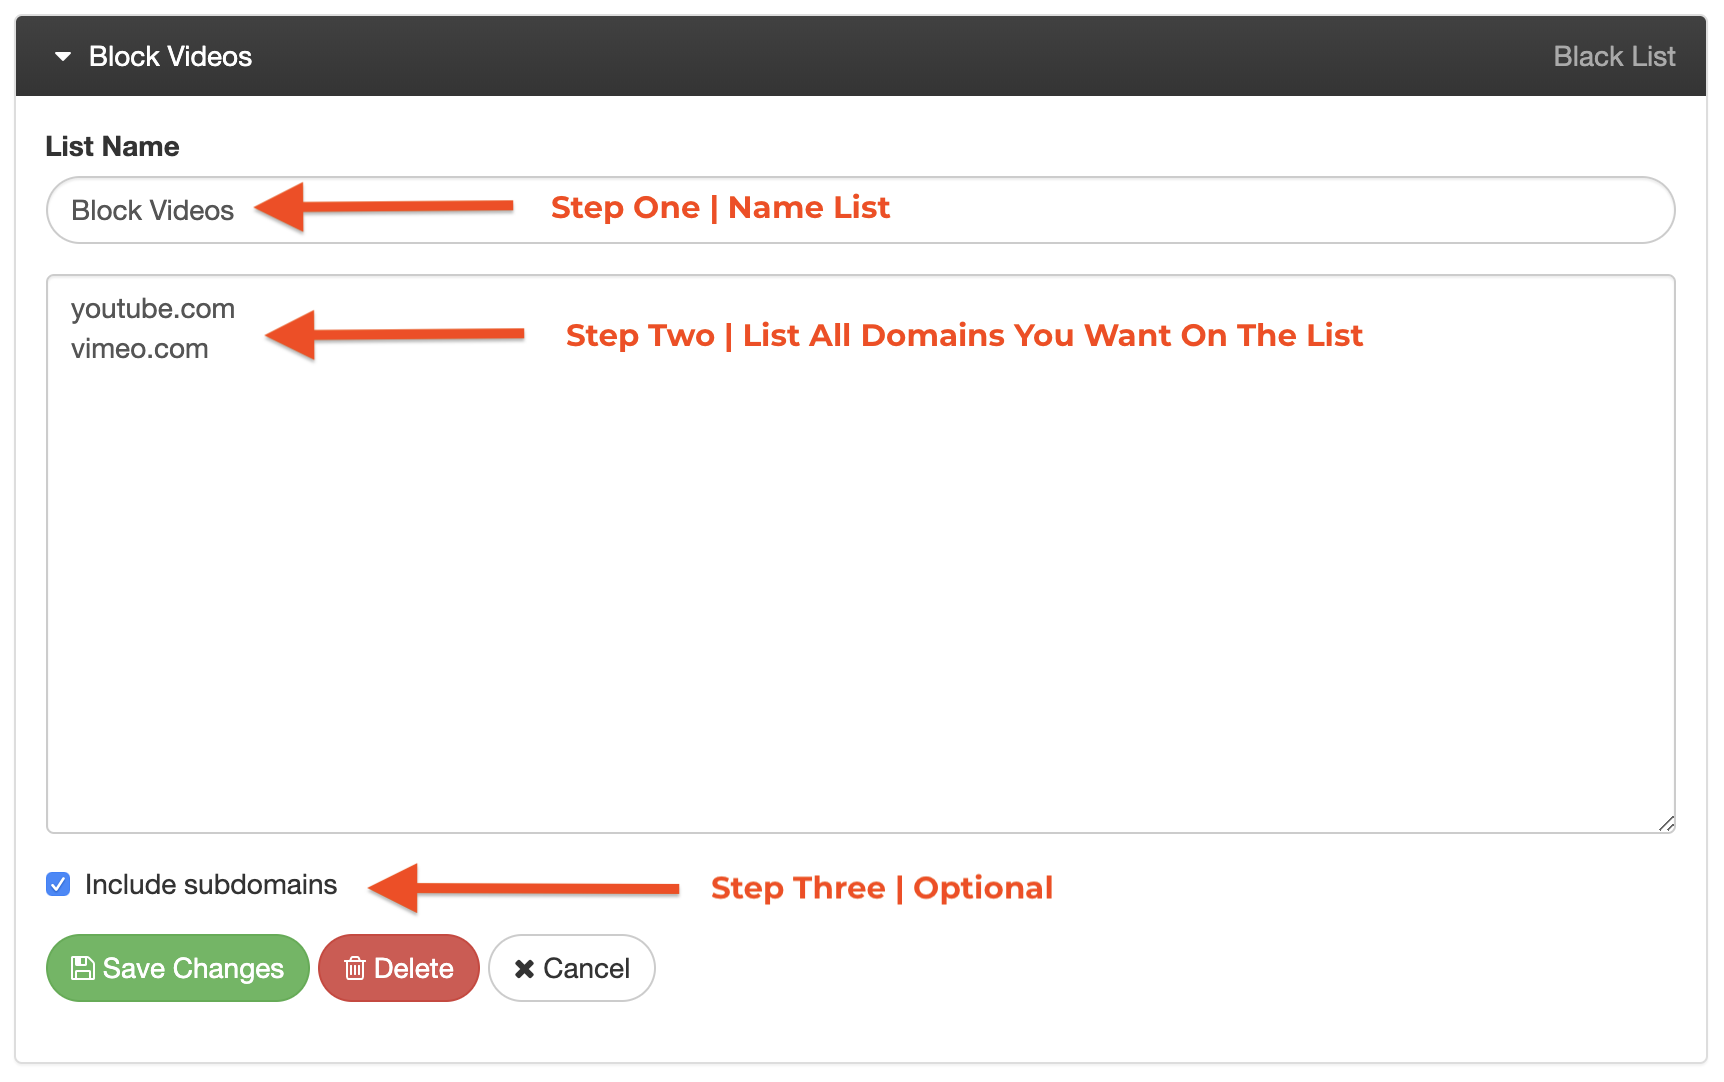
- Click the Save Changes button to save your work
Once you’ve created your list, head over to the policy that you’d like to apply these rules to. There you can simply turn these rules on and off from the dashboard for each policy.
Share a list:
To share a list, click the Share List link when you open your list to view it. Copy the address and give it to those you wish to share it with. They can now enjoy the safety that this list brings.
9.2 My Enablers
Click on the My Rules tab in the main menu.
Then locate the Enabler tab at the top of the new page.

Create An Enabler:
- Click on New Enabler
- Give your enabler a name
- Click on Create enabler
- Create the rules
Rules format:
The rules are formatted in the format of [destination]|[ports]:
- Destination: One of the following formats:
- One or more comma separated IP addresses. Ex: 8.8.8.8,8.8.4.4
- A network. Ex: 192.168.0.1/24
- A fully qualified domain name. Ex: www.google.com
- Ports: A comma separated list consisting of all the following:
- t/u: TCP or UDP.
- s/d: Source or destination.
- Ports: Either one port (80) or a range of ports ((3478-3497)).
Sample: 127.0.0.0/8|ud3478-3497,td80,td443
9.3 My DNS Forwarders
Click on the My Rules tab from the Main Menu in your Dashboard.
Locate the DNS Forwarders tab at the top of the new page.

To add a DNS Forwarder follow these steps:
- Click on the New Forwarder button
- Give it a name and optionally a description
- Enter the IP address for the server under endpoints, adding additional endpoints as needed.
- If the server you are adding blocks websites, select a DNS filter method to replace the default block page
- Visit the Policies page and edit your default treatment to use this forwarder.
9.4 Editing My DNS Filtering Treatment
To edit your DNS Filtering Treatment, simply navigate to your Policies page.
This will open up your default policy. At the top of the Rule Set Table you will note your Default Treatment. To edit the treatment applied, simply click on the Edit button to the left of where your Default Treatment is listed in the Rule Set Table.

This will open a new dialogue box where you are able to pick one of the following six treatments that come with you adam:ONE™, or create your own.
- 1.1.1.1 - Cloudflare
- CleanBrowsing Adult Filter
- CleanBrowsing Family Filter
- OpenDNS FamilyShield
- OpenDNS Home
- Quad9
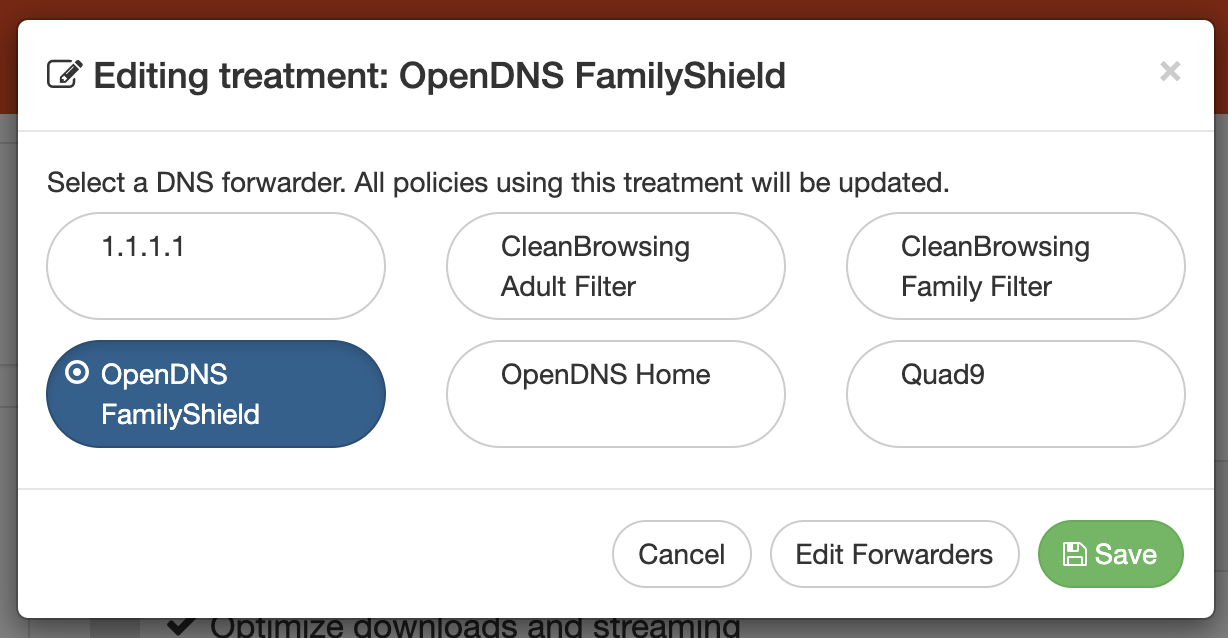
Note
Once you select the DNS Forwarder you’d like to assign to each Policy, using the above method, any policy that has your current treatment applied, will be updated with this new forwarder after clicking on the Save button.
If you’d like to create your own DNS Forwarder, just click on the Edit Forwarders button.
10.0 Subscriptions
Subscriptions are verified white lists that have been created for you by our team here at ADAMnetworks.
To subscribe to any verified white list:
- Click on the list Subscriptions tab from the Main Menu in your Dashboard
Note: Any other lists you are subscribed to will also be listed on this page
- Click on the verified white list you are interested in
- Click Subscribe
- Visit the Policies page and activate it for all desired policies
Note: This only has an effect for White List Policies. It will not be displayed on policies with other filtering modes.
Any subscription that we here at ADAMnetworks have created, will update for you as we update it. This is one of the amazing features of adam:ONE™. Any Subscription you are signed up for will update automatically for you as new domains are changed to ensure that you are able to access the content you want through the subscriptions. This simplifies running on a whitelist. If there is a subscription that you’d like us to consider adding to the list, please let us know anytime through the forum at support.adamnet.works.
11.0 Devices
11.1 Identifying Devices in your dashboard
To identify all the devices on your network, let’s start with your device. Click on the MyTools tab in the menu at the top of your page.

This will take you to your MyTools Dashboard.
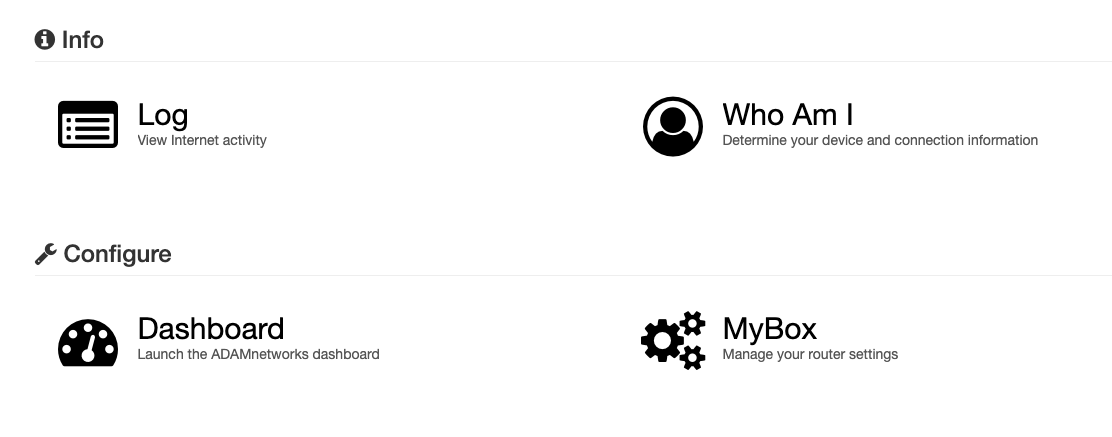
To identify your device on your network and be able to assign it to any of the default or custom policies you create, start by clicking on Who Am I.
This will open a new page. On that page you will see your Device information along with your Network information. To identify your device on the network take note of the Name listed in the My Device section, and the Policy your device is currently on.
Note
If you are setting up your adam:ONE™ for the first time, your device will most likely be on the default black list policy of ‘Block The Bad’.
As we track all the devices on your network by their unique MAC address, you’ll also see this, along with your Internal IP address that is assigned to your device. These two fields will be useful when looking up a device whose name is unclear or unknown.
For now, take note of the Name given to your device and let’s head back to the main dashboard by clicking the DASHBOARD button in the top navigation menu.

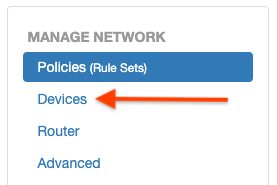
Now that you are back to the main dashboard, click on the Devices tab from the Manage Network menu.
Here you’ll see all the policies you currently have active on your network.
Along the right hand side of the table you’ll see the number of devices on each policy. If this is your first time setting up your adam:ONE™, all your devices will most likely be on the default “Block The Bad” black list policy.
Simply click on the name of the policy from the list and it will expand your view to see all the devices currently on that policy.

From there, look down the list of devices that have joined your network and locate your device by name. For more information about the device click on the Show device details link at the top of the Policy Table.

This will list the unique MAC & Internal IP address for each device on that policy. This is helpful when you don’t recognize the name given to the device by default.
Now that you have located your device, click on the Edit button just to the right of your listed device.
From here you can:
- Rename your device
- Assign it to a different policy
- Give permissions to see the network logs from this device
- Create or assign this device a tag for filtered views to group the devices on your network. For example, Admin, Staff, Kiosks. Kids, Printers, etc.
Once you’ve made your changes, simply click on the Save button.
If you want to delete a single device from your network you can do that here as well by clicking on the Delete button.
Note
This does not block the device from rejoining your network if they have your wifi password, but it does help to clean out devices that haven’t joined your network in a while. When this device does rejoin your network, it will be assigned to your Default Policy.
If you don’t want to save your changes, just click the Cancel button to close.
For more information on how your device is enrolled and named on your adam:ONE find more articles in our Support Forum at support.adamnet.works.
11.2 Batch Editing
If you’d like to edit multiple devices at a time, you can use the Batch Edit feature.
Once you click that feature, choose the Action you’d like to perform and then select all the devices you’d like to apply this edit to by expanding the policy where those devices are located. Click on the checkbox beside each of the devices you want to apply this edit to.
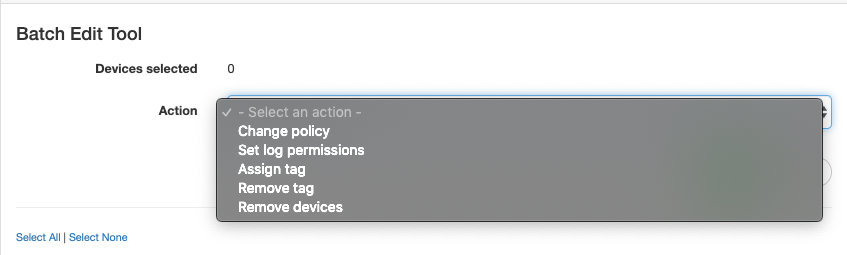
You’ll notice the Devices selected number will update as you add devices to this batch edit.
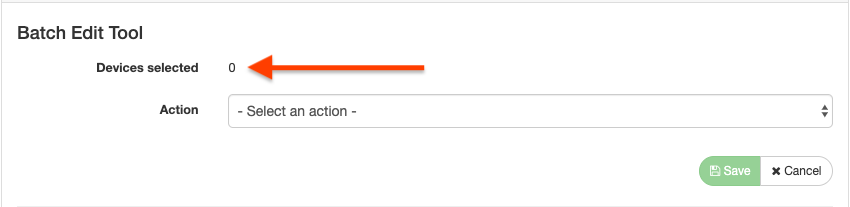
Once you have all the devices selected for this edit, click the Save button to make the changes.
11.3 Assigning Devices to Policies
Once you locate the device you’d like to assign, simply click on the Edit button to the right of that listed device.
From there, click on the Policy dropdown and choose the policy that you’d like to move that device to. Click Save and you’re done.
To create your own custom policies see here.
11.4 Allow A Device To View Logs
Built into your adam:ONE™ is the ability to view the logs of all the devices on your network and what they are logging into at any given time, in real-time.
To allow a device to view the logs on your network locate that device within the policy you’ve assigned it to using the Devices tab.
Then click on the Edit button to the right of that listed device. This will open a new interface where you’ll find a Logs dropdown box. Click on the box and choose the permissions you want to give to that device.
Your choices are to view:
- No logs
- Own logs
- All logs
No Logs
This setting will block all logs from being viewed on this device.
Own Logs
With this selected, the device will only be able to view the logs that are associated with that device.
All Logs
With this option, the device will be able to see all the logs from your network. We recommend this be turned on for your adam:ONE™ Administrator. This way your adam:ONE™ Administrator can see all that is happening on your network and be able to troubleshoot any issues that may arise.
11.5 Viewing The Logs Of My Network
To see all that is happening on your network follow these simple steps:
- Review Allowing A Device To View Logs
- Log into your adam:ONE™ dashboard
- Click on MyTools in the navigation menu at the top of your page
- Once in MyTools, click on Log - View Internet Activity or from the navigation menu, click on Log
- This will open your Internet Logs
There you will see all your devices that are active on your network and the activity that they are engaged in.
Any of the logs that are GREEN are what is being allowed on your network based on your policies.
Any of the logs that are RED are what is being blocked by your policy settings.
To change views between Domain Logs and Traffic Logs, simply click on the dropdown menu in the upper left hand corner of your page. You can play or pause your logs anytime using the button located in the same place if the logs are moving too quickly.
In Domain Logs view you’ll see which rules are being applied to either allow or block the specific devices requesting access with each domain being referenced.
In Traffic Logs view you’ll see information on the protocol, ports and amount of data being transmitted for each log entry, among other useful data that allows you to understand what is happening on your network.
If you’d like to isolate any detail on the log through filters, you can enter those at the top of the page in the Filter Search Bar. You can also click on the filter symbol beside any of the entries to isolate it. Once you click on a filter symbol, you’ll see that filter show up in your Filter Search Bar at the top of your page.

Using your logs is key to pinpointing any issues with device access.
11.6 Handling Unblock Requests
Note
This feature is only available to devices on white list policies. Make sure that the policy you are using has been set to white list mode.
As a part of running your network on adam:ONE™ with white lists, users will encounter a Block Page if they are trying to access a website that is not on your white list already. This is the whole point of running a white list! Only sites that have been approved and are added to your whitelist can be accessed. However, there will be times when there is a page that you want access to that is being blocked by one of the rules that you set up as a part of your policies.
Note
Unblocks can currently only be requested for white list policies.
When you encounter a block page, you will notice a Request Unblock button to send an unblock request to your adam:ONE™ Administrator (if you’re not running Adaptive Whitelisting) or, to our Tree Of Knowledge in the cloud if you’re running Adaptive Whitelisting that will help make the decision if the domains and dependencies requested are safe. The Tree of Knowledge is our proprietary AI engine that continues to check and learn what are safe domains and what are not safe.
When using Adaptive Whitelisting, this will have one of three outcomes:
- The domains requested are deemed safe: These domains will be UNBLOCKED and automatically added to your assigned Adaptive Whitelist. An email notification will be sent to you as the administrator. From that point forward, you will be able to access the added domains.
- The domains requested are deemed unsafe: These domains will be REJECTED and will not be added to your assigned adaptive whitelist. An email notification is sent to you that the unblock request was automatically rejected. The system takes note of the automated decision, and if a new request for the same rejected domain comes in, it will refuse the Unblock Request with AI inspection.
- Safety Unsure of the domain requested: This occurs when there is too little information available to the AI in the cloud. When this occurs, the AI will pass the responsibility to you as the Administrator to decide. The request will be sent to the Unblock Request Manager.
A message “This request is sent to your Administrator” will show up on the Block Page and the Unblock Request will be listed in the Unblock Requests section of your dashboard. An email notification is sent to your Unblock Request Manager to let them know an unblock request was made that requires their attention. For more information on adding an Unblock Request Manager to your account see below in this section.
If you’re not running the automated Adaptive Whitelisting module, all unblock requests will be sent to your Unblock Request Manager to decide about adding them to a white list or not.
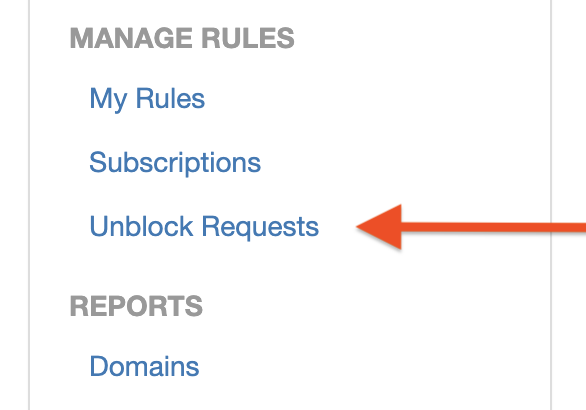
In your ADAMnetworks Dashboard, you’ll find the Unblock Requests tab in your main menu.
There are two main elements of your Unblock Requests.
First, the ‘Requests’. The default view for your ‘Unblock Requests’ is a table that shows you all the requests that either you or others on your network have initiated. Here is where you can deny or allow any request made as the adam:ONE™ Unblock Request Manager or Administrator..
Simply check the box(es) of the requests listed and then click on the Action dropdown box to select how you’d like to handle those requests. Select the action and click Apply. This is will apply that action to all the requests you selected.
Once you’ve accepted or rejected a request, you will see all this history listed in your Closed section. Here you can Delete or Reopen your unblock request. If you previously allowed access to a particular domain and would like to now deny access, just reopen the request and change your setting of this domain.
Once you Reject a request, it prevents it from being requested in the future, unless you delete or reopen the request and change the permission.
If you’d like to Delete your settings and move this domain back out to be requested again, simply choose Delete from the Action dropdown menu, check the box of the request(s) you’d like to remove and click Apply.
Please note that ‘Unblocked’ domains are added to the list you choose. To send the request to the owner of another list, you can forward the request to that list owner. The request will then appear as Pending until they respond.
The second element of your ‘Unblock Requests’ section is the Settings tab. Here you can set the Unblock Requests Manager that will receive a notification by email of every request that comes in through those using your network. To receive Unblock Requests, just click the Add Manager link and enter the email address of who you’d like to be notified. For each new person notified, click on the Add Manager link and enter in their email address.
Note
If don’t want to receive any notifications and prefer to check your unblock requests manually from your Dashboard, don’t add any managers here. Your Unblock Request Managers must have administrative access to your adam:ONE™ Dashboard in order to process the ‘Unblock Requests’. To grant them this permission, add them as a user and set their permissions accordingly.
12.0 My Account
12.1 Accessing My Account
To access any of your accounts with ADAMnetworks, you’ll find your Account link in the upper left hand corner of your browser window. Using the dropdown menu by clicking on the down arrow, you’ll have access to every account where you are a user. Click on any of your connected accounts to access them.
Note
If there is an account that doesn’t show up on your list, but you know you are a user, this is due to the email you are currently logged in with. If you’d like all your accounts to show up in this dropdown, simply use the same login email for each account. Then all your accounts will show up here. This allows you one login for all your accounts. You’re welcome :)

If you’d like to add another account from this dashboard, simply click Add An Account. If you’d like to Rename the current account you are logged into you can do this from the Account dropdown as well..

12.2 Your Locations
Every account can have multiple locations. As each location you manage under your account, uses its own adam:ONE box, this is where you connect those locations to the appropriate account.
Having multiple adam:ONE locations allows you the freedom to set up your network how you want it, everywhere you need to connect, all managed by one account.
To change the Location you are viewing simply click on the Location dropdown menu using the dropdown arrow.
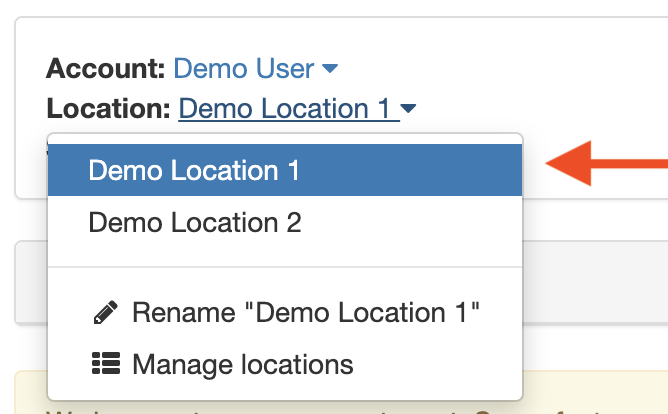
Within the dropdown you’ll find all your locations associated with the current account. You can Rename the current location and Manage your locations from this menu.
Note
Every location you manage within your account will need it’s own adam:ONE.
To add additional locations, simply click on Manage your locations. This will take you to your Billing Settings. See My Billing Settings for instructions on how to set up new locations should you need help with this.
12.3 My adam:ONE™ Status
You’ll find the current status of your adam:ONE™ located in the upper left corner of your open browser window. The status will read one of the following:
- Online
- Offline
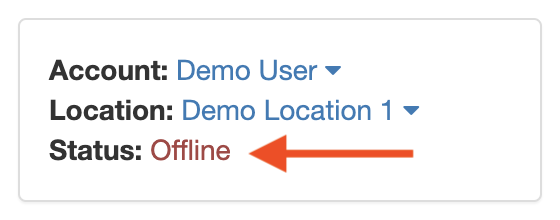
If your status is showing ‘Offline’ check out our Troubleshooting Section within this manual.
13.0 Administration Settings
13.1 Adding A User To My Account
Adding a user to your account allows someone else control over your account without giving them your user account information. This is especially useful for a group or business that wishes to have one person in charge of all of their accounts.
If you want someone else to access your account this is how you do just that:
- Click on the Manage Users tab under Administration in the main menu
- Enter the name and email address of your new user

- Click Send Invite button
Your new user will receive an email inviting them to join your adam:ONE™ account. They will be asked to set up their account, along with a unique password. We recommend that each of your users set up Two Factor Authentication on your account to increase security.
13.2 My Referrals
Found under the My Referrals Tab, your adam:ONE account gives you a referral link. Share your unique link with anyone you like. When someone creates an account using this link, you get the credit.
Currently, each active referral gives you a discount of $0.50 a month!
13.3 My Billing Settings
Under the Billing Settings Tab in the main menu you’ll find all your billing information associated to your ADAMnetworks account.
Within the Network Overview, you’ll see all the network locations you currently have under your account. There you’ll find the plan each location is on and the Box ID of each adam:ONE at each location.
13.4 Changing My Network Settings
If you’d like to make any changes or add other features to your network settings click on the Change Networks button.
From there, you’ll be able to Edit, Delete or Add A Network.
Once you’ve made your changes, click the Continue button
If you’d like to change any of your billing information on your account click either Update Contact Information or Update My Card. If no changes to your billing information is necessary simply click on the Continue button.
If you’d like to exit out of the billing changes you’ve made and not record any of these changes, just click the Cancel button at anytime.
Once you click on the Continue button, you’ll be taken to the confirmation page. If everything looks good, click the Save button at the bottom of the page. If you are not satisfied with your changes, either click Back or Cancel to adjust or exit respectively.
13.5 Changing My Billing Information
If you’d like to just change your Billing Information without making any changes to your network settings, simply click on the Change My Information button at the bottom of the Billing Settings page.
13.6 Upgrading My Account After My Free Trial
After your free trial has expired, you may be prompted to add additional billing information to keep your account active. Should you need to do this, simply follow the steps listed above to change any network settings or billing information.
14.0 Managing My Network
For quick set up of your Policies and Devices check out those sections within this manual.
14.1 My Router Settings
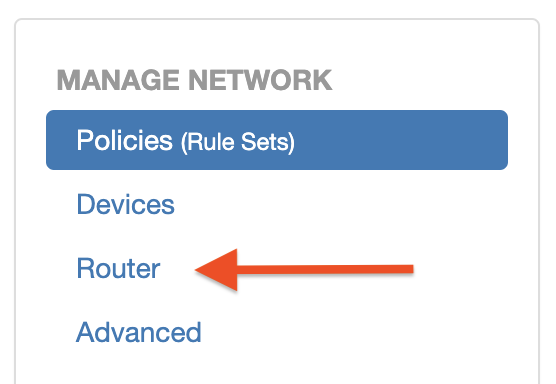
To access your router settings click on the Router tab from the main menu.

Once on the Router Configuration page you’ll find:
- Your Box ID
- When your router was last seen
- Our firmware version running on your adam:ONE™
- Your WAN settings
- Your LAN and Netmask settings
Let’s dig into some of this deeper.
Your Box ID
The Box ID of your adam:ONE™ connects your location in your adam:ONE account to your physical device that you have plugged into your network. If you ever need to reference your Box ID, you will find it under your Router settings from the main menu within your adam:ONE Dashboard.
Last Seen Notification
Your adam:ONE™ currently checks in every 30 seconds. If you make any changes to your adam:ONE™ setup like your policies, devices or subscriptions, it will take up to 30 seconds for those changes to take effect on your network. If you are unsure if a change has been applied, first check this Last Seen Notification section to ensure that your adam:ONE™ has checked in since making your changes.
For more in depth troubleshooting of your router settings see the Common Issues section within this manual.
You also find Advanced Option Settings for your router on this page.
Domain Logging
Domain logging is helpful to get a list of your most frequently visited domains. Then you can import these domains into a whitelist when transitioning from a blacklist environment to a whitelist environment which would be our recommendation as you move towards and into The Bright Web. If you log domain visits for 1-3 months and then put that on a whitelist, it helps minimize disruption during the transition, so only less frequently used sites end up being sent to your Unblock Request Manager for an unblock request.
Note
Our support team can not access your traffic logs unless they are given access to their device during a support ticket. You would need to provide our support team with a support key in order for this access to be granted to ensure your security and privacy.
Automatic Device Discovery
Your adam:ONE will automatically discover every device that joins your network. With new devices joining your network, you can set up which policy these new devices get assigned to by setting up your default policy.
Note
You can always reassign devices to any policy you want after they have joined your network if the default policy is not where you want a specific device to reside. See section Working With Policies for more details on this.
For more information on how your devices are named and enrolled see the Devices Section in this manual.
Send Diagnostic Data
By turning on this feature, you send diagnostic data to us. This helps us refine our service.
Allow Support To Access My Router
This feature is specific to adam:ONE clients using ASUS routers. If you are running adam:ONE on pfSense, you’ll need to allow access as described in this article on our Support Forum:
https://support.adamnet.works/t/allow-adamnetworks-support-access-to-pfsense/43
When you activate this feature, you open an SSH port to allow the support team to access your router. Note: We cannot access any of your computers or other connected devices.
This simply opens a VPN (Virtual Private Network) tunnel that our support team can use to SSH into your adam:ONE. SSH (also known as Secure Shell or Secure Socket Shell), is a network protocol that gives our support team a secure way to access your network.
This is only necessary when your router is experiencing double NAT which would not allow us to SSH your device using a public IP address. For now, feel free to leave it unchecked if you are running adam:ONE on an ASUS router as it is only used in specific support issues. Just know that your our support team may ask you to enable this feature to be able to help offer support. And know that it is secure.
14.2 My Network Advanced Settings
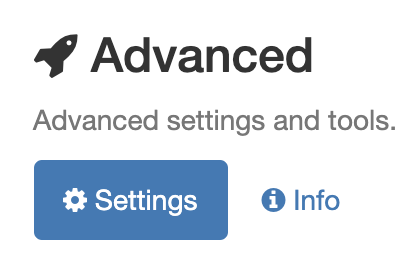
To access your advanced network settings simply click on the Advanced tab from the main navigation menu.
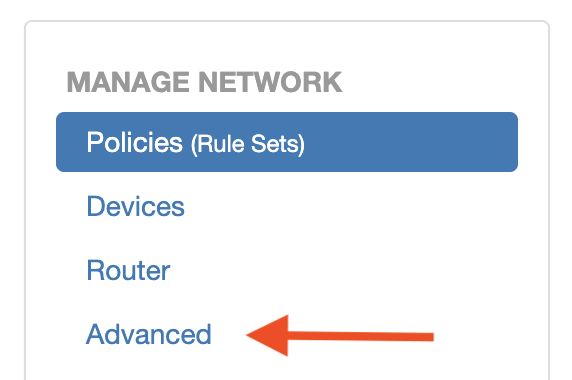
Once on the Advanced Settings page, you find two tabs to choose from:
- Settings
- Info
SETTINGS
General
Under your general settings you set the Timezone you are located in. This allows you to set up internet access Schedules for your devices, along with tagging your Domain and Traffic Logs with the appropriate timestamp.

OpenDNS Account
If you have an OpenDNS home account, activate this feature ‘Follow My IP” to send OpenDNS your IP address whenever it changes. This makes sure your Polices and the Rules you’ve set up will be applied to your account.

Don’t Talk To Strangers™
This amazing feature for Business and MSS(+) customers provides an additional layer of security, preventing any connections from being made without first making an approved DNS request.

Be sure to check out our DTTS™ enablers once you turn on this feature, on your policies to add support for additional services.
The Don’t Talk To Strangers (DTTS)™ feature
If you are running on an adam:ONE™ Business or Managed subscription, you will also have access to our Don’t Talk To Strangers (DTTS)™ feature. If you are operating on one of those plans and you don’t see the DTTS™ feature, simply click on the Advanced Tab in the menu on the left, find the Don’t Talk To Strangers™ section and click on Enable DTTS™. Then click Save at the bottom.

Then come back to this policy by clicking on Policies from the menu on the left.
Make sure you’re on the policy you’d like to apply any customization with DTTS™ using the dropdown menu and scroll to the bottom of the page. There you’ll see the DTTS™ Feature listed.
With our Don’t Talk To Strangers™ feature, you have the highest level of security you’ll need. Even if something does get into your system that is trying to take your data hostage or mine it out and send it to those trying to violate you or your data, this Don’t Talk To Strangers™ feature makes sure they can’t. DTTS™ does not allow your adam:ONE™ to talk to strangers.
Here’s how it works. Imagine the role of a border official. This person’s job is to allow or refuse entry to visitors. This person stands on the edge of the border and is there to secure the border. In the same way that these border officials need to have at least a reasonable risk assessment of entering individuals, so to does the edge of your computer network. While detailed traffic between endpoint and secured server remains private and encrypted, the determination of which devices are communicating where, remains in control of the edge.
To make this happen the edge must have DNS visibility. This is not only sensible, but it is possible, and everybody wins. Here’s how:
Endpoint ⇄ [Secured DNS channel] ⇄ Edge ⇄ [Secured DNS channel] ⇄ Public Resolver
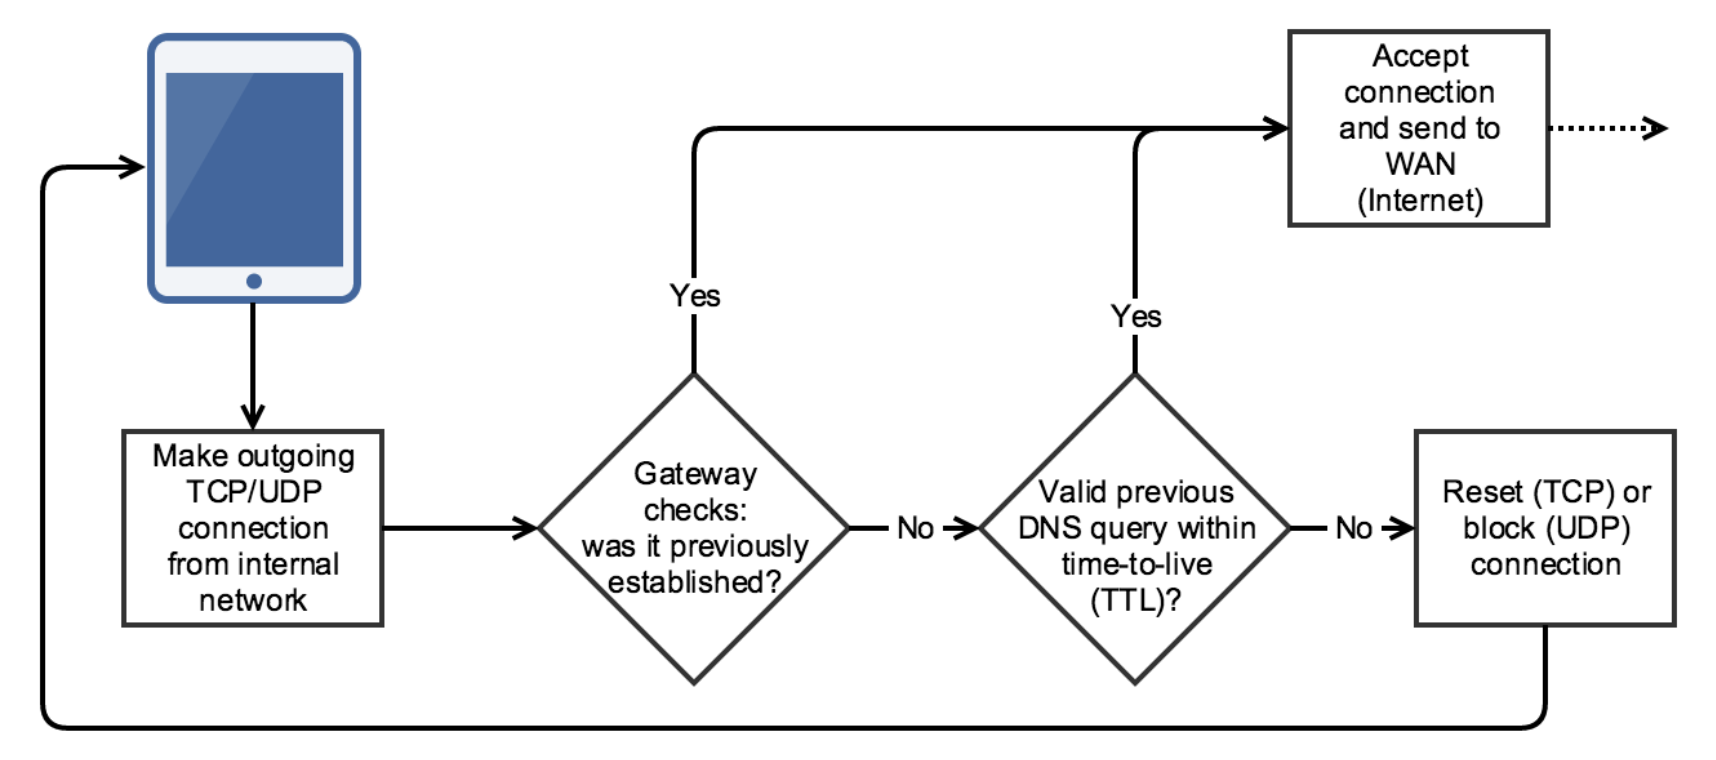
To give you privacy while allowing sysadmins to have the tools to protect the managed network, all outgoing connections must be whitelisted with DTTS (Don’t Talk To Strangers)™. This is a short-lived firewall “allow” rule based on the TTL (Time To Live) of successful DNS answers. “Strangers” are destination IPs that are not first resolved via DNS.
For example, badactor.co will not resolve to an IP address, therefore, the no “allow” rule is temporarily created for the asker, but only for the period of the TTL. Likewise, any internet traffic attempted without an allowed DNS query is simply not allowed. This approach gives you the complete confidentiality of a banking transaction, for example, while the sysadmin knows only that Internet-Exit-Point-A is conducting business with Bank B, not aware of any further details.
To find out more about all the ways you can shape your internet using DTTS™, be sure to check out our support material on Don’t Talk To Strangers™ on support.adamnet.works. Here’s one that will help you create Enablers that open up specific IP ranges that you may need to open for certain sites to be accessed when using DTTS™ on a pfSense setup.
Note
It is important to only open the IP range that you need and nothing more to minimize your security risk. This article shares how to get you started.
https://support.adamnet.works/t/enablers-on-pfsense/77
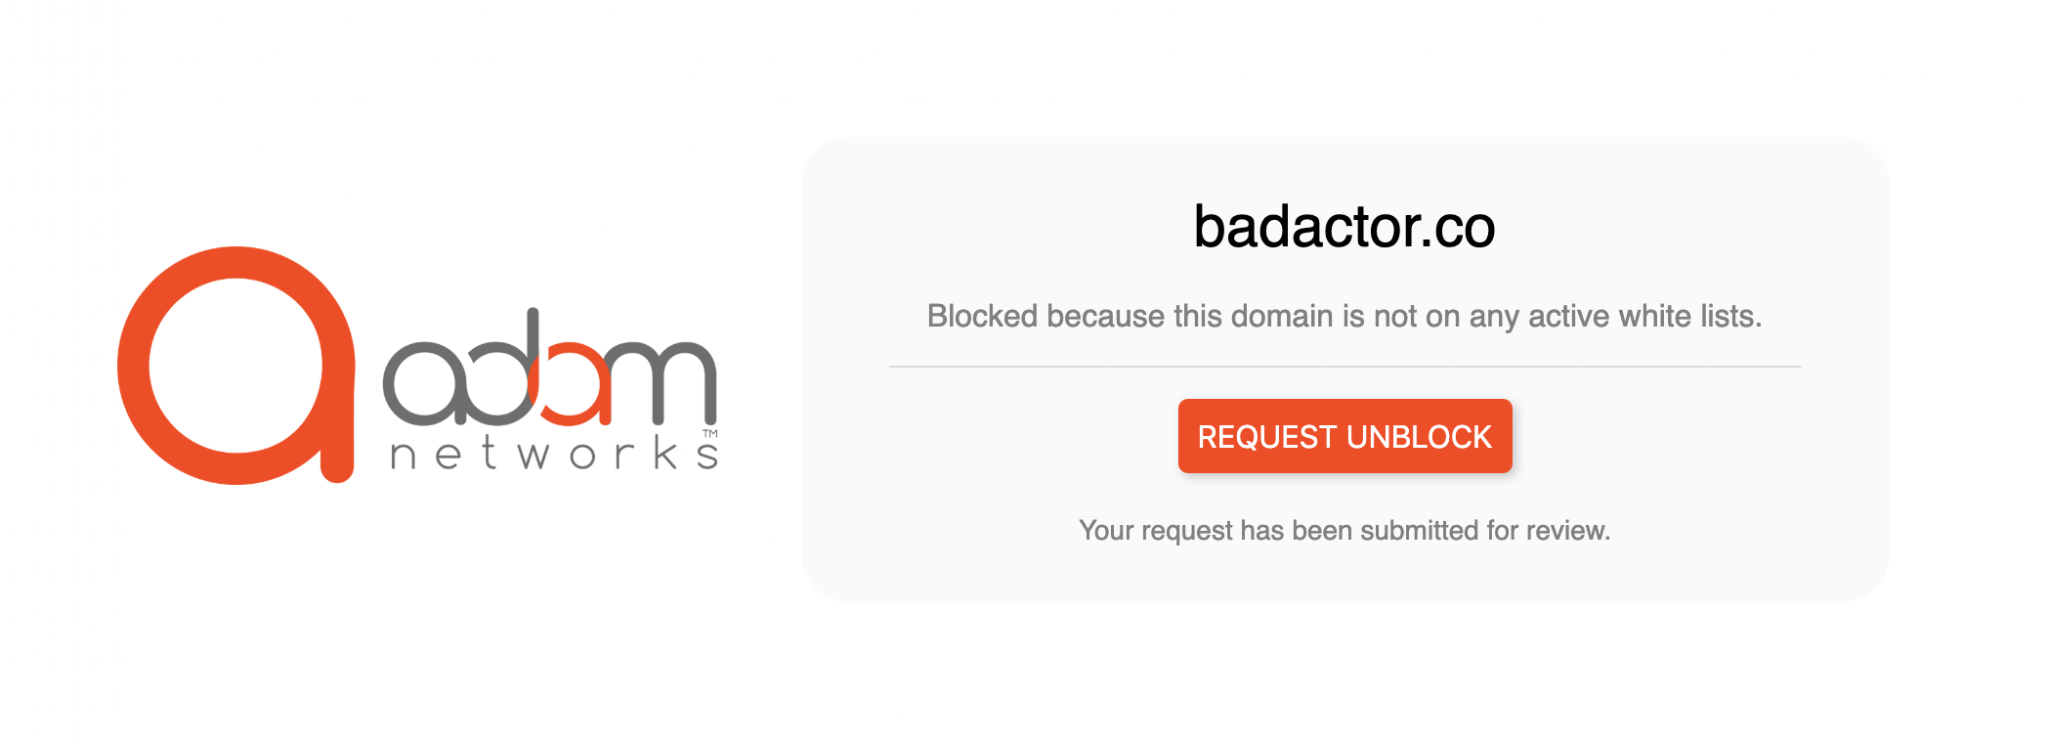
Custom Blockpage
As you encounter domains that are either being blocked by your Blacklist or Whitelist Policies you will see a blockpage. This block page by default has ADAMnetworks branding on it.
For the block page to work correctly, each device on your network must have the Block Page Extension installed in the Web Browser.
The block-page extension works with all chromium-based browsers, including: Chromium, Chrome, Brave, Vivaldi, Opera, and more.
More information can be found in our Forum article here:
https://support.adamnet.works/t/block-page-assistant-for-secure-sites/34
Once you have the Block Page Extension working, you can customize it via the Dashboard: Manage Network -> Advanced -> Customize Blockpage.
Your adam:ONE allows you to customize this blockpage to add a logo of your choice and make the logo a clickable link to any website you want. We have ours set to take you to our homepage on our ADAMnetworks site.
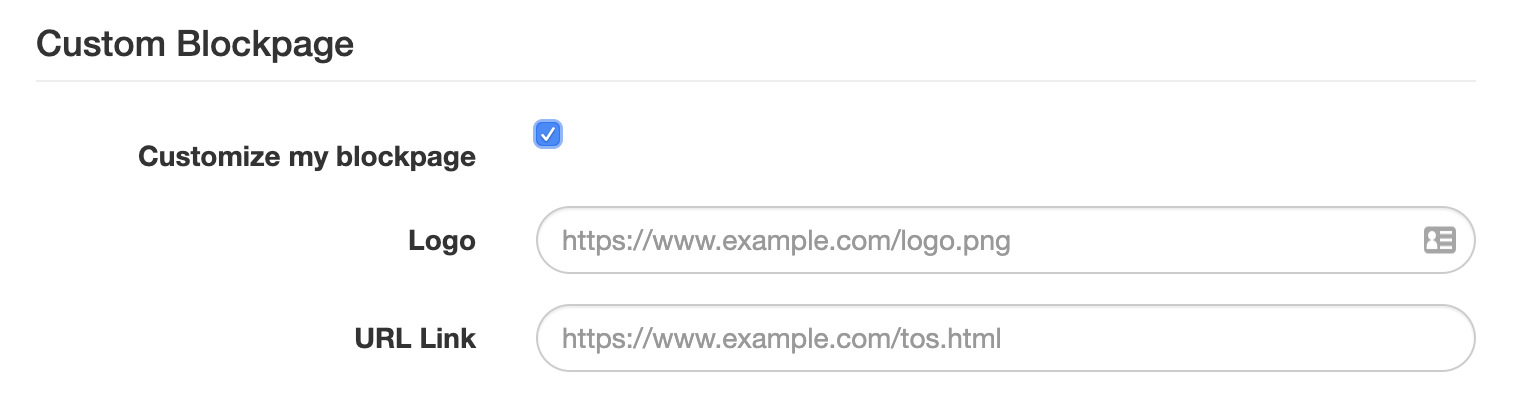
For example, you could place your company logo here and have the link point to your policies or process on submitting an unblock request. This would make sure that everyone knows what to expect when they request access to any domain they submit.
Unblock Request
To customize the message that appears below the UNBLOCK REQUEST button on your Blockpage, simply enter in your text in the box provided
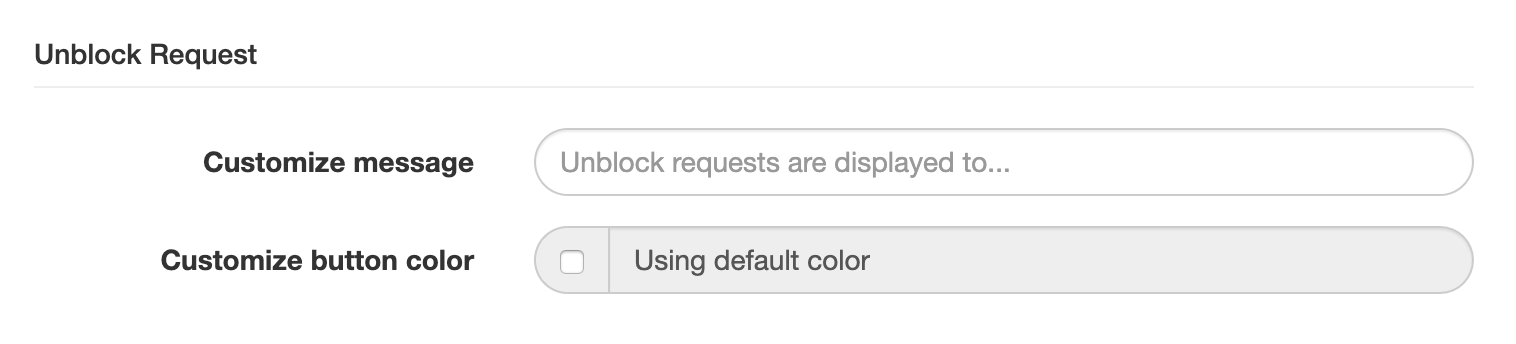
To customize the button color of your UNBLOCK REQUEST button, check the box. This will display the current default color of ADAMnetworks. Click on the color bar. This will open your computer’s color picker. Pick the color you’d like the button to be.
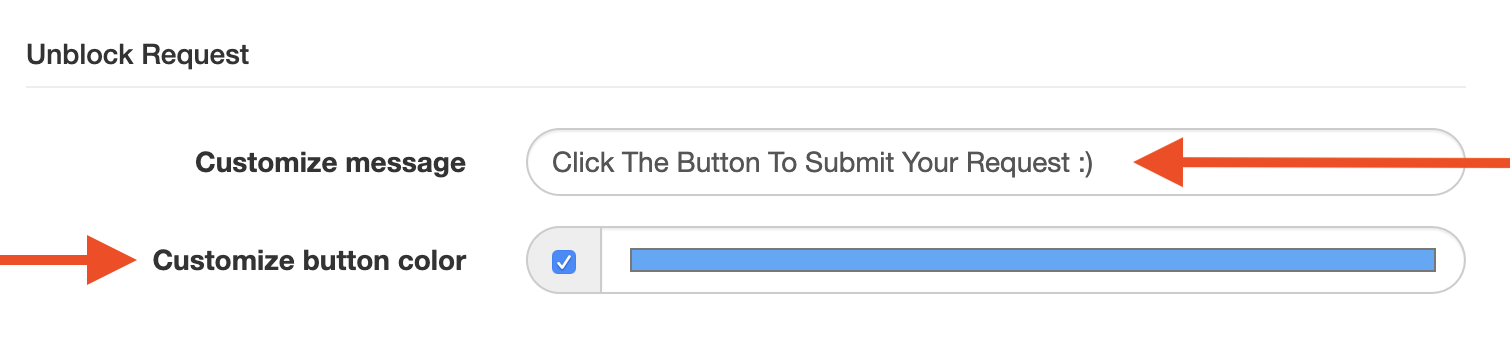
Be sure to save your changes by clicking the save button at the bottom of the page. You will see you changes occur in one to two minutes.
Adaptive Whitelisting
This feature uses our Tree Of Knowledge technology to learn and adapt your whitelists to what is safe when unblock requests are made by the users on your adam:ONE™ network.
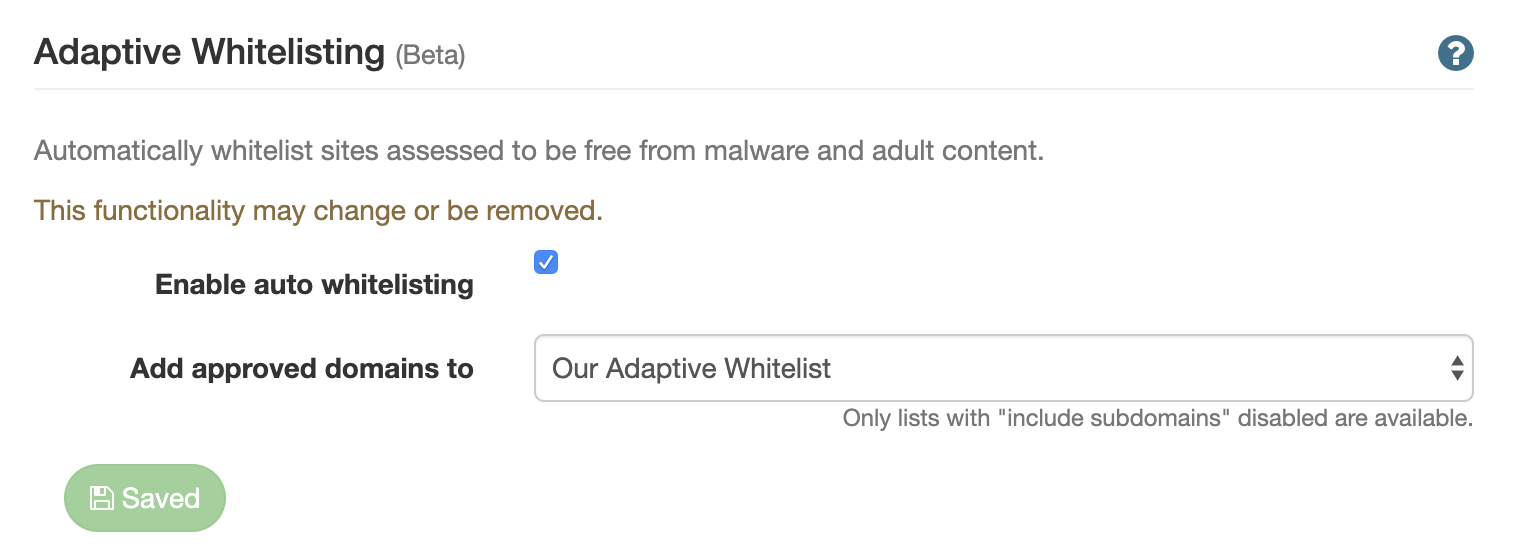
With this feature turned on, if a site is found to be free from malware and adult content, the Unblock Request will be approved without your Unblock Request Manager needing to approve it. If you’d rather all requests be approved by your Unblock Request Manager leave this feature disabled.
Learn how to set up your Unblock Request Manager here.
Note
You can only add domains to a whitelist using this feature that has the ‘include subdomains’ feature disabled.
If needed, create a new white list and then choose that list using the dropdown menu.
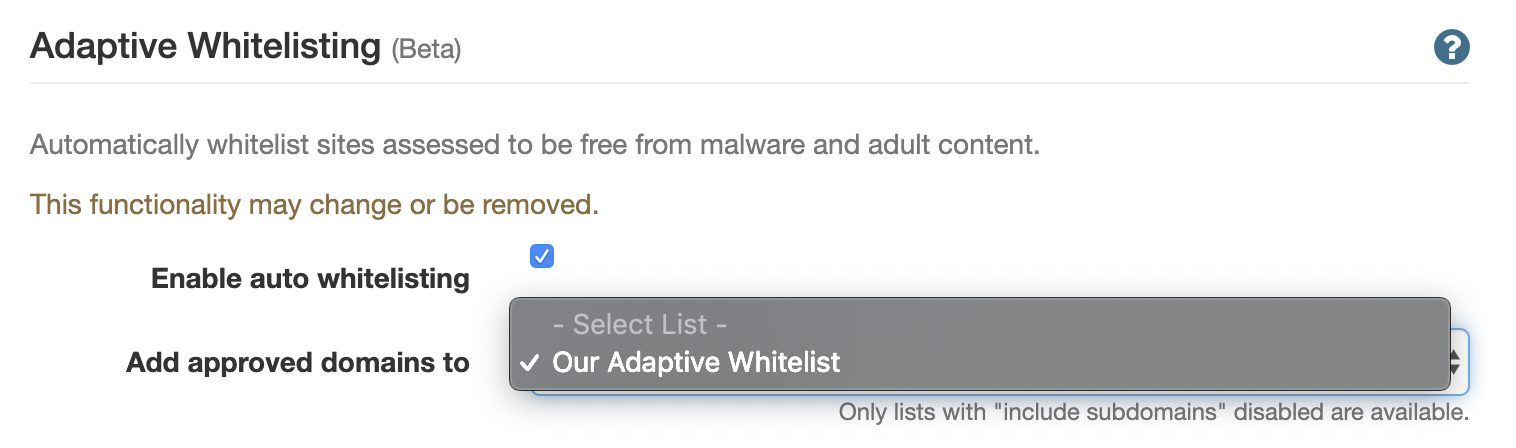
Be sure to click Save at the bottom of the page when you are done.
ADVANCED INFO SETTINGS
Under your Advanced Info Settings you’ll find:
- Your IP Settings
- Your Hostname
- Your Troubleshooting Link to Detect DNS Hijacking
Note
Your Hostname is dynamically updated to point to your router’s public IP address. This can be used as a consistent address for VPN and SSH servers.
To use the Detect DNS Hijacking tool, the device you are using needs to be assigned to a profile with Adult Content filtering enabled.
15.0 My Domain Reports
15.1 Choosing My Networks
When you open your adam:ONE™ Domain Reports, the first thing to do is to ensure you are viewing the reports for the network you want. To do that use the dropdown menu at the top of the page to choose your network in the Overview Section.
15.2 Choosing My Reporting Dates
Pick the date range you’d like to report on using the date picker dropdown.
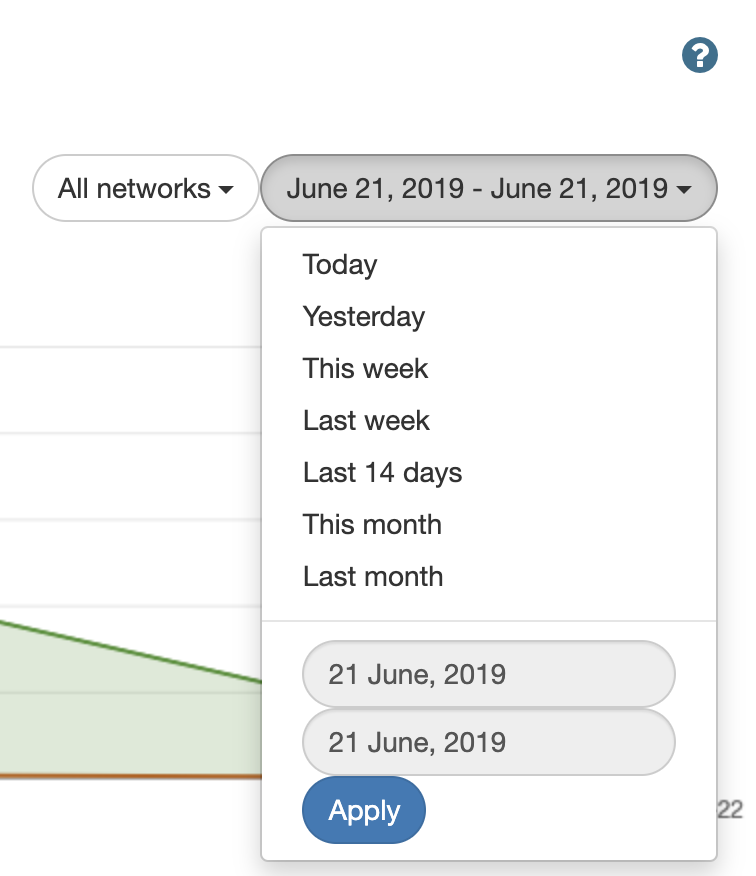
You can pick from:
- Today
- Yesterday
- This week
- Last week
- Last 14 days
- This month
- Last month
- Custom Range
Note
If you pick a custom range you’ll need to click the Apply button to create the report
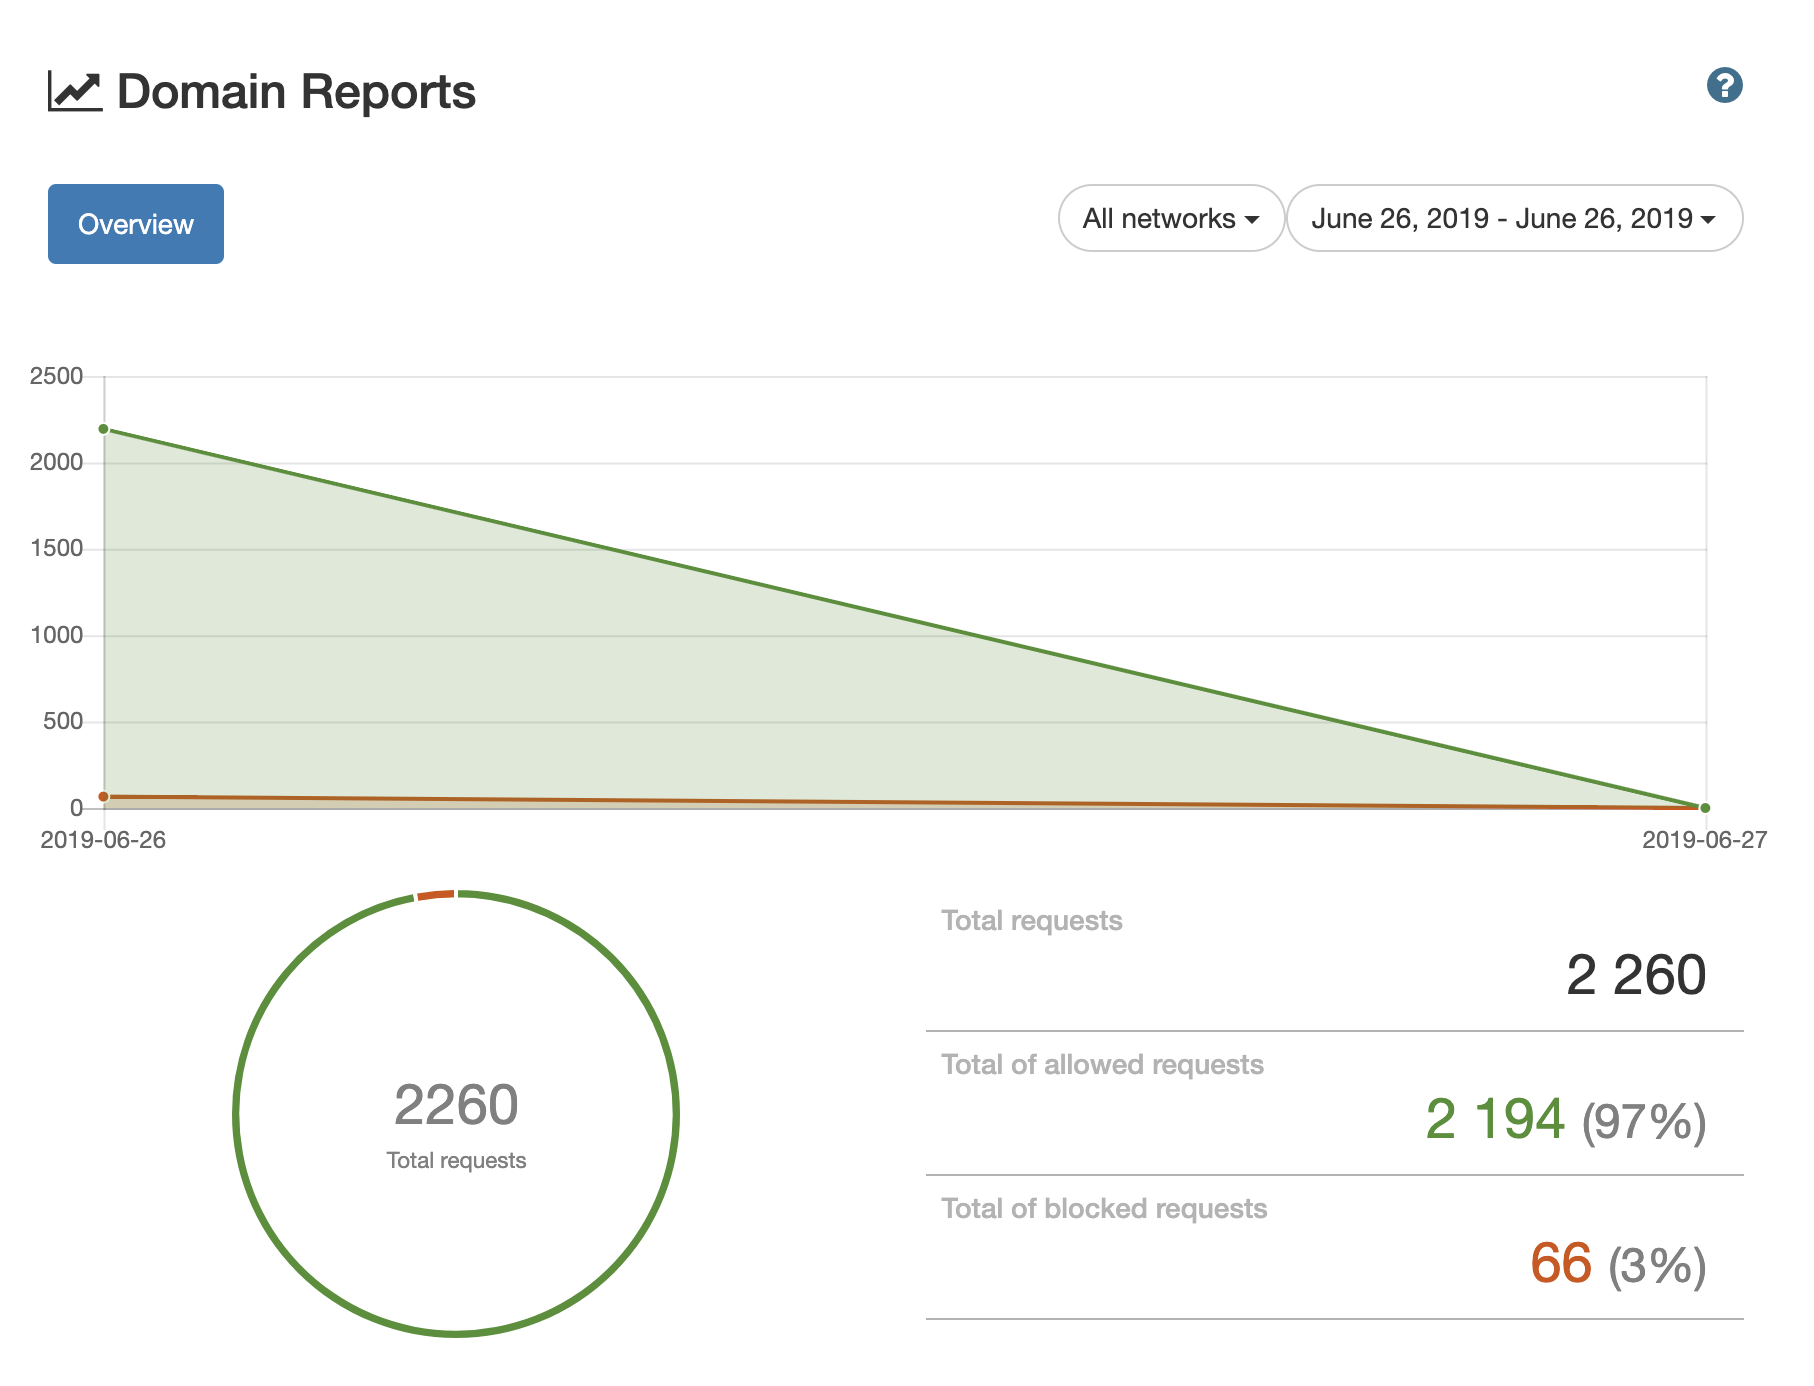
Once you select your network and the date range you’d like to report on, your Domain Report will update dynamically.
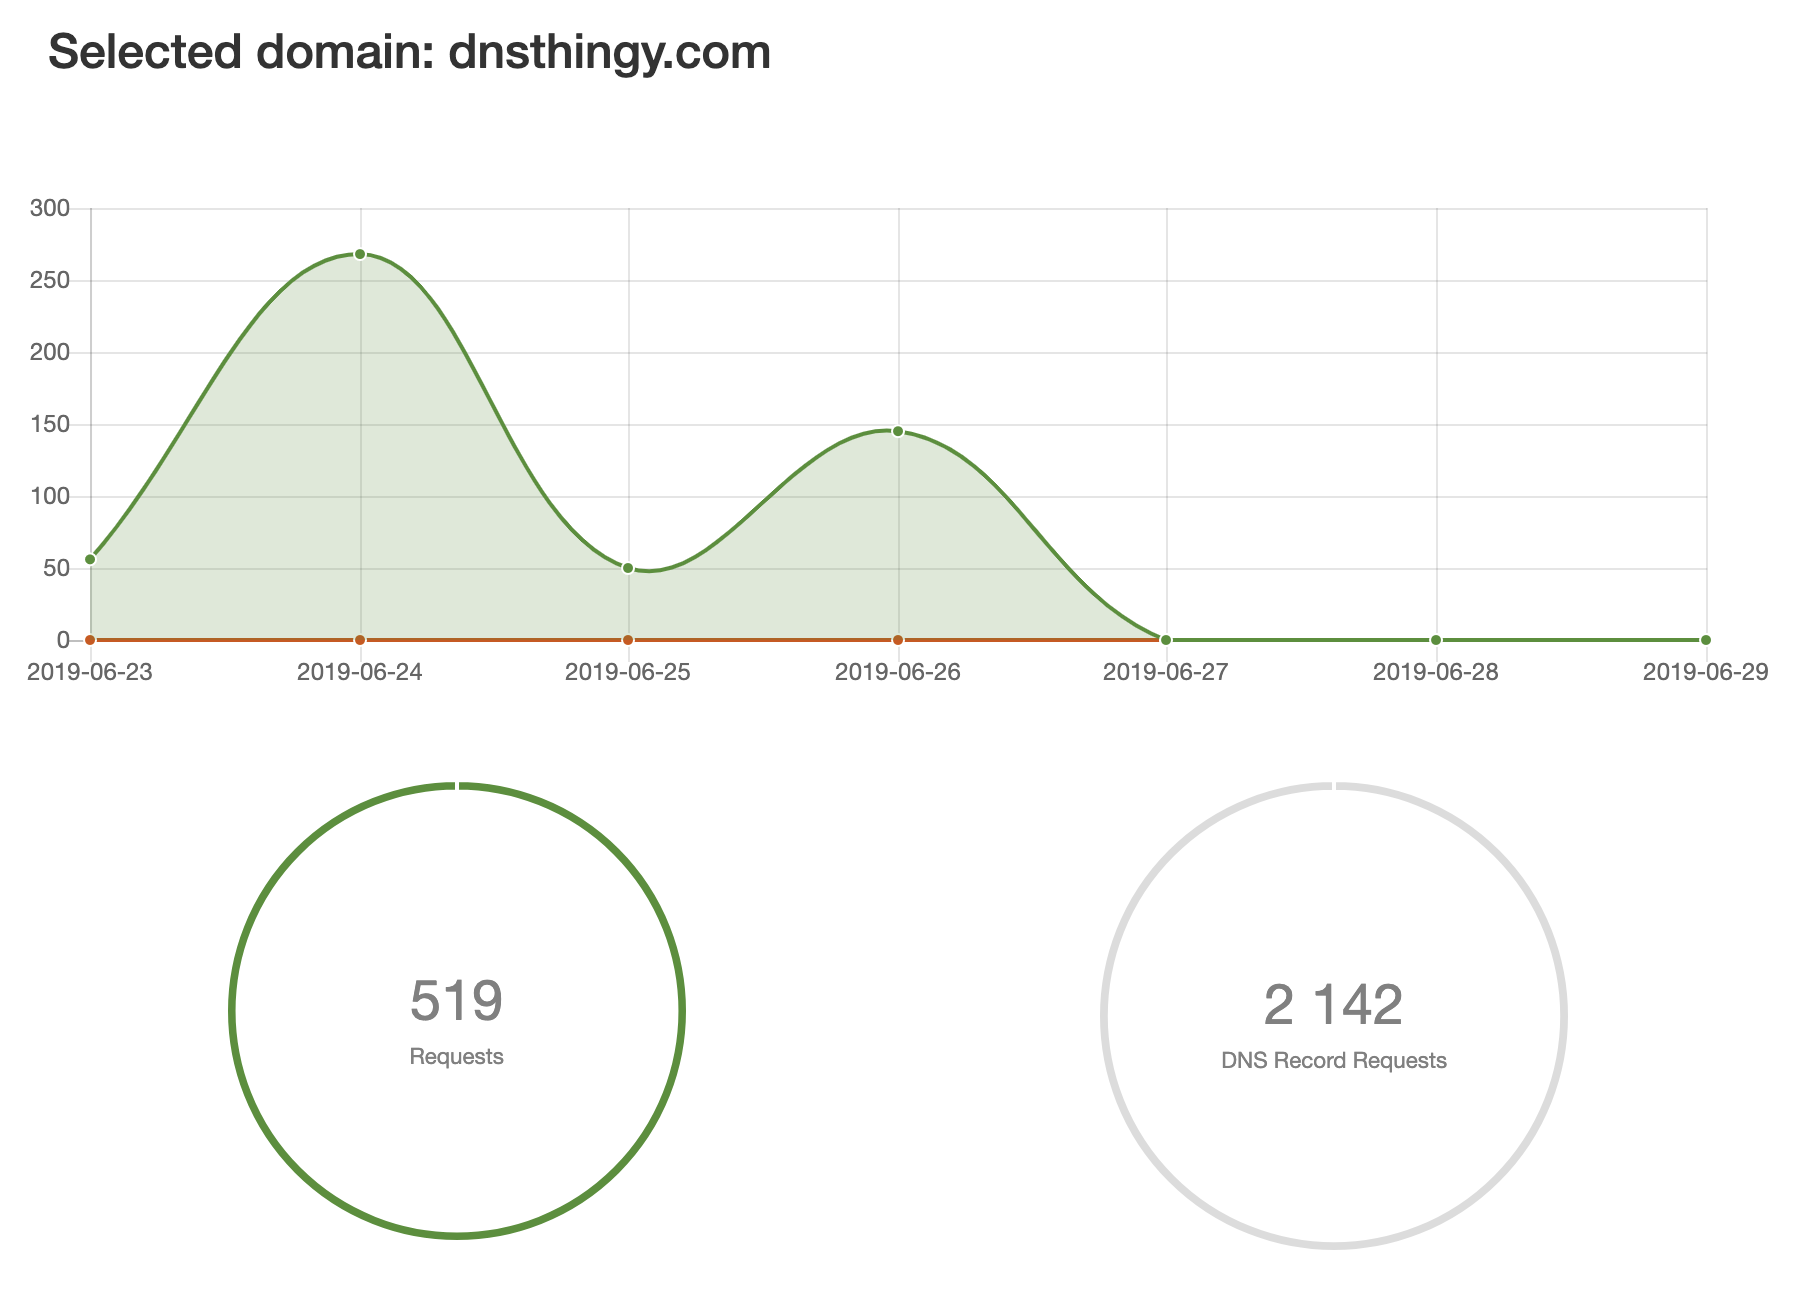
Your report will display for the date range selected:
- Total Requests
- Total of Allowed Requests
- Total of Blocked Requests
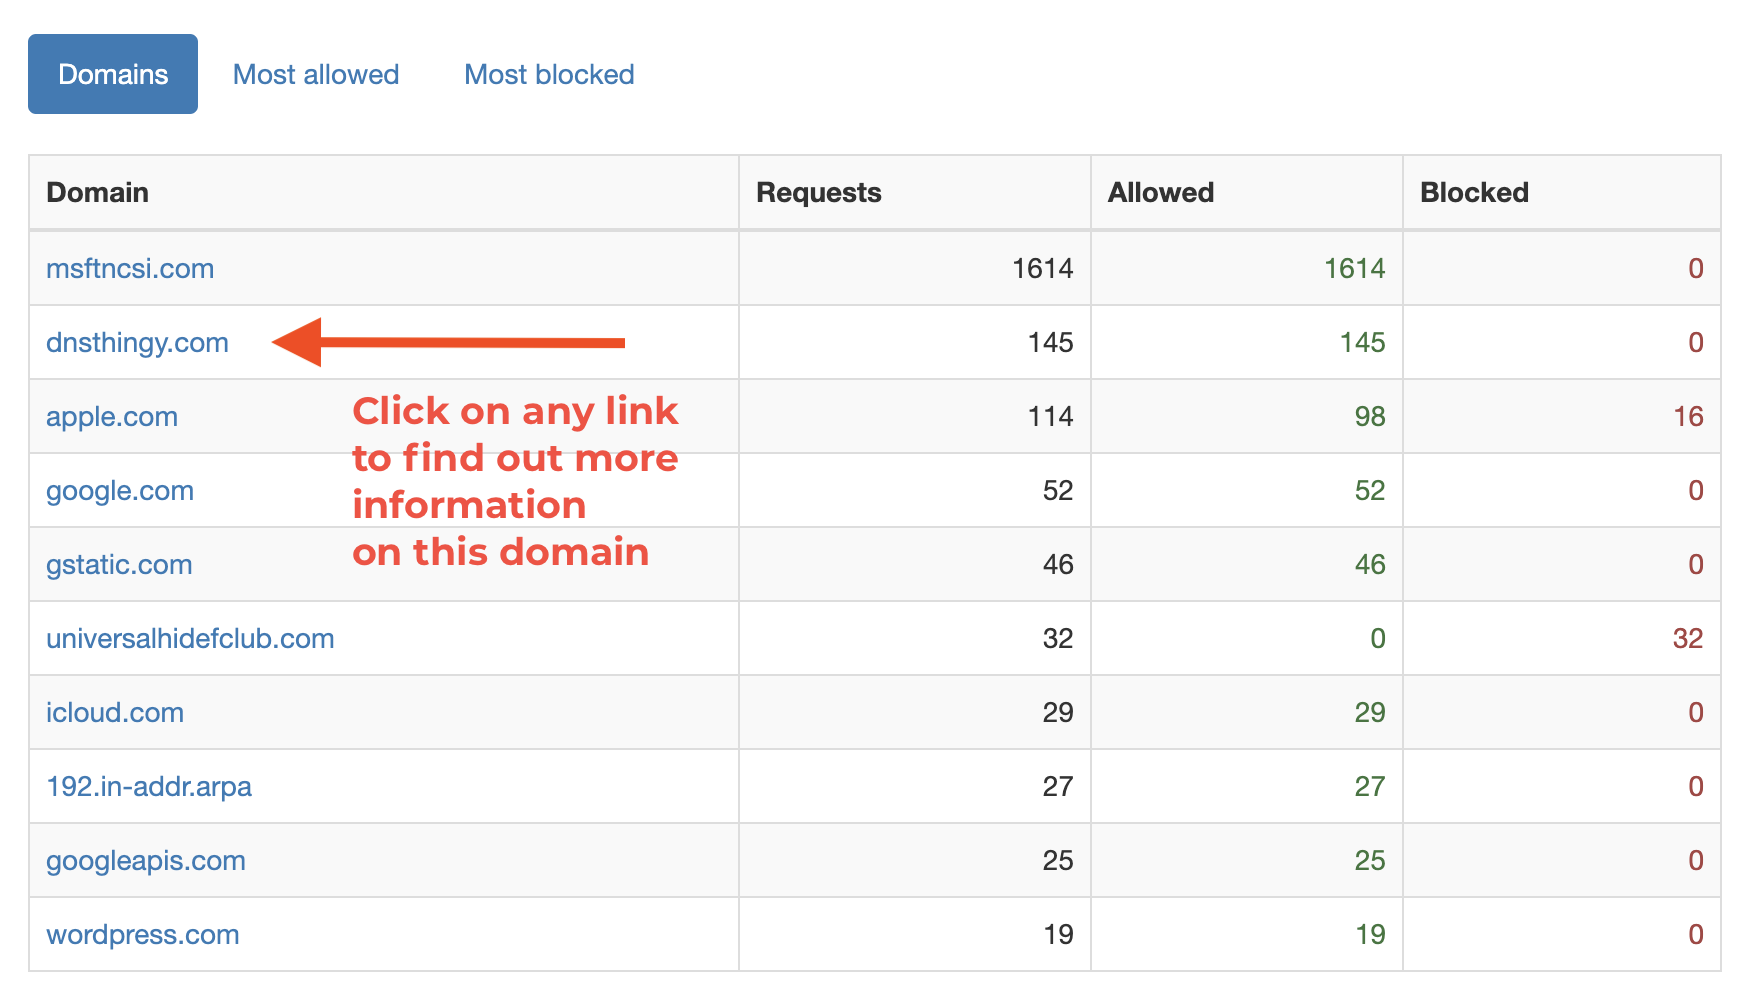
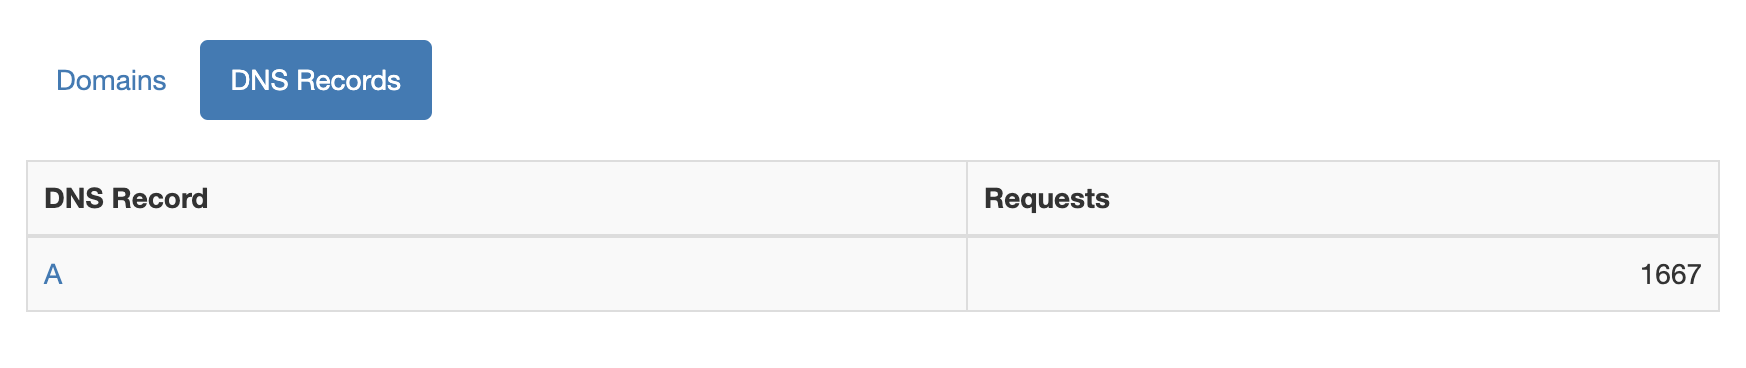
As you scroll down the page, you’ll see the next table. This table gives you the data for the selected date range of the Top 10 Domains requested according to the Tab you are on. There are three views to choose from:
- Domains
- Most Allowed
- Most Blocked

Clicking on any of these Tabs will give you detailed information about what has been allowed and what has been blocked by your adam:ONE™ policies and rules.
If you’d like more information on the domains listed in any of the three views, simply click on the link and it will open a new window with all the information your adam:ONE captured for you.
16.0 Common Issues | Troubleshooting
16.1 I Need Access To A Site I Can’t Get To - I’m being blocked!
In filtering your internet experience, you will encounter sites that are blocked that you want to access. The key to solving any access issues is to understand the best way for you to set up your security and filtering to get the experience you want. Let’s walk through some of the common sources for confusion that arise as you shape your internet exactly how you want it.
The fastest way to determine why a site is being blocked is to take a look into your Network and Traffic Logs. To learn how to do that, review Viewing Logs within this manual.
Once you determine the rule that is blocking the site, you have a couple options to gain access.
I’m Being Blocked By A Blacklist Policy Rule Set
First, you could turn off the Rule Set that is blocking the site. We recommend careful consideration with this. There is a reason you have it turned on, or why it has been turned by default. Whatever you do here will impact all the devices assigned to this policy. If you want to open your access to more of the internet and stay on a blacklist consider setting up a new policy and assigning your device to that new policy. This will keep the other devices secured how you want.
Second, you could set up a white list policy, make sure the domain(s) you want access to are on your list and/or subscriptions and assign your device to this new white list policy. This would be our recommendation. Here, you are allowing only what you deem safe and can truly shape your internet the way you want it. This is what we call The Bright Web. A safe internet experience shaped by you, for you.
Third, if you want to continue using a blacklist policy you can set up a Forwarding List using the My Rules Tab in the Main Menu. For more information on using Forwarding Lists see Managing My Rules within this manual and the following article on our Support Forum at https://support.adamnet.works/t/exemptions-from-blacklists/35
I’m Being Blocked By A Whitelist Policy Rule Set
If your device is assigned to a whitelist policy, and you know the site is safe, simply add the site to your white list and you’re done. For more details on how to set up your whitelist see Customizing A White List within this manual.
Before you set up a new whitelist be sure to check out all the white list subscriptions already that are a part of your adam:ONE subscription. We’ve done the work for you. If there is a service that you are trying to access online, we may already have a subscription set up. Just subscribe to that list and we keep it up to date. If there is a subscription you’d like to recommend that we create, let us know anytime through support.adamnet.works.
Be sure to check out our section on the adam:ONE Block Page Assistant at support.adamnet.works. You can use this free tool, downloaded from the Chrome Web Store to help you assess which sites need to be added to your white list to make using specific sites online seamless.
When a site is being blocked that you want access to here is what you should consider, in this order, as you troubleshoot:
- What policy is my device on?
- Blacklist
- Whitelist
- Schedule
- What rule sets do I have enabled within that policy that may be causing something to be blocked that I want access to?
- What other features have I enabled that maybe blocking the site?
What Policy Is My Device On?
The type of policy your device is on determines how content is being filtered. This sets up what is being blocked and allowed.
Black Lists
By blacklisting sites you are telling your adam:ONE not to allow those sites in. You are allowing access to the entire internet and blocking out what you don’t want. Think “Allow All - Deny Some”
White Lists
With whitelisting, your adam:ONE blocks out everything and allows what you tell it to. Think “Deny All - Allow Some”.
Schedule
If your device is assigned to a Schedule Policy, it could be that the timing of when you are accessing your network is restricting certain sites due to the policy that is active at that time.
For example, you could have a No Internet Rule set up under your Schedule Policy to restrict access during certain times of the day. In this scenario, if you are trying to gain access to the internet during these times, you will have no access.
Which type of policy is your device currently on? Once you determine that you are able to troubleshoot further.
For more detailed descriptions on how to set up Blacklists, Whitelists, Schedules and Forwarding Lists look within this manual and check out the support forum at again at support.adamnet.works
Next, if you’ve set up your blacklists, whitelist and forwarding list Rule Sets and you still don’t have the access you want, it could be that your settings of Don’t Talk To Strangers (DTTS)™ need to be adjusted. The DTTS™ feature is available to all Business and MSS/MSS+ clients. For more information and troubleshooting articles on setting up DTTS™ check out our support forum.
If you’ve set up all this correctly, then a site could be being blocked outside of how your adam:ONE is configured. Should this be the case, feel free to connect with our support team at support@adamnet.works. Our networking experts can explain our support service options and walk you through the right solution to get your network working as you want it to.
16.2 Improper Network Setup - My filtering isn’t working
If your adam:ONE™ doesn’t seem to be filtering properly:
- Review the Working With Policies section in this manual.
- Review the My Rules section as well to ensure you have set up your rules and applied them to each policy you want them assigned to.
- Review the Assigning My Device section to make sure your device is assigned to the right policy.
- Review the Don’t Talk To Strangers (DTTS)™ section, if you are on a Business or MSS/MSS+ subscription.
If all your adam:ONE™ settings are in order, then typically your network has been set up in a way that is causing an issue. Feel free to contact our Support Team at support@adamnet.works. Our Network Specialist can go over our support options with you and ensure you get the internet experience you want.
16.3 My router is offline!
If your router is showing as offline, this means it is no longer connecting to your dashboard in the cloud.
Here are some reasons you may be experiencing this issue:
- Your Internet is down.
- Your router has been unplugged.
- There may have been a configuration change made on the router that is preventing it from fully functioning.
Should you need further help to diagnose this issue, check out our Support Forum at support.adamnet.works or email us at support@adamnet.works.
16.4 How Do I Make Sure Psiphon Is Blocked?
Blocking Psiphon is one of the key features your adam:ONE can provide depending on the subscription level you have. For more information on how to block Psiphon check out our article on our Support Forum here:
https://support.adamnet.works/t/how-to-block-psiphon/33
16.5 Free Video Tutorials
For more help check out our free video tutorials at the link below.
https://vimeo.com/adamnetworks/videos