
Authorize Botize to use your Gmail API?
By providing your Google Calendar Service Account Key represent
that you agree to aloww Botize to connect to your account.
Gmail account automation is only allowed for Google Suite accounts.
The first thing you have to do is create a Service Account in the Google Cloud Platform Console. Follow this steps to set up an account:
STEP 1. To create a Service Account, you must Create a Project first.
1. Go to the Google Cloud Platform (GCP) Console and sign in as a super administrator. Choose an option:
- If you haven't used the GCP Console before, agree to the Terms of Service and click Agree and Continue.
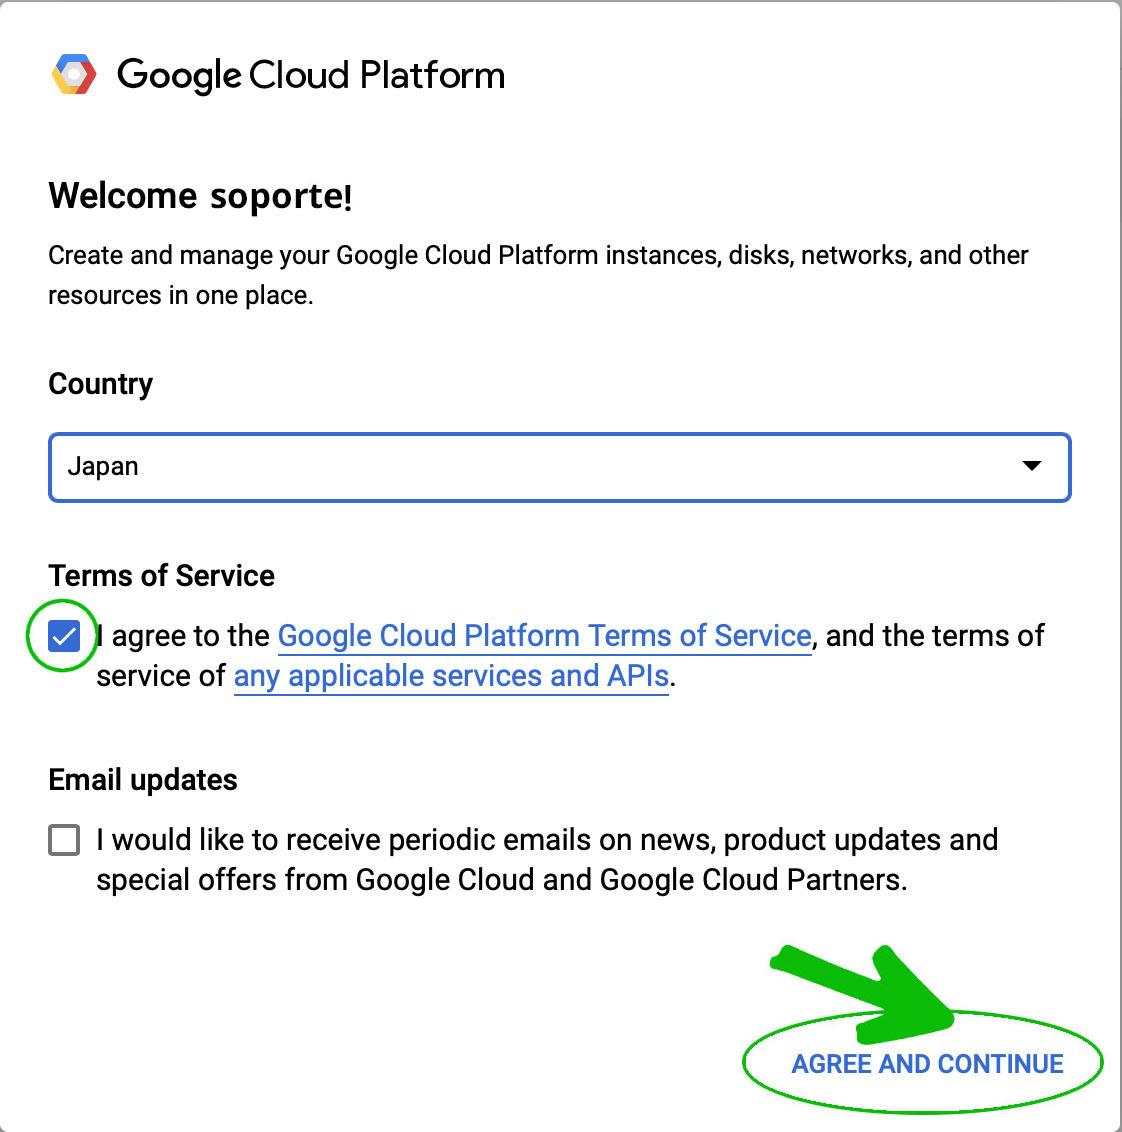
Then click Create.

- If you have used GCP Console before, at the top of the screen next to your most recent project name, click down to open your projects list. Then click New Project.
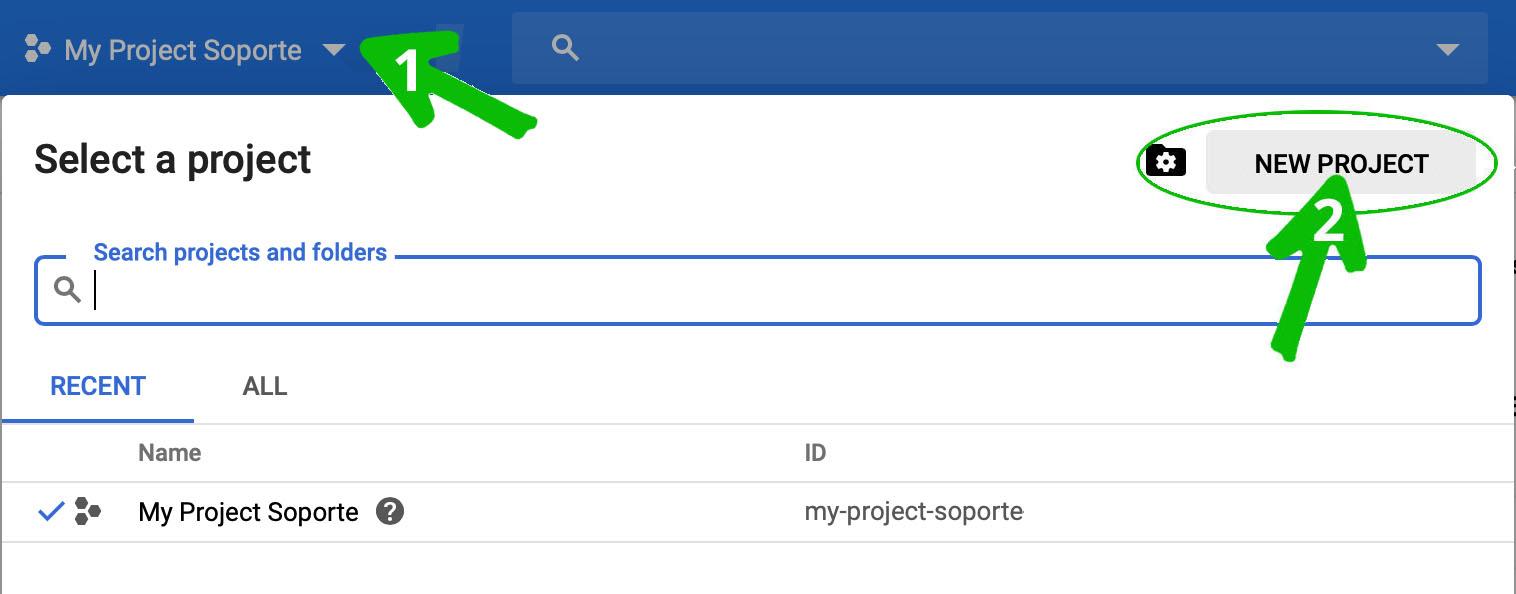
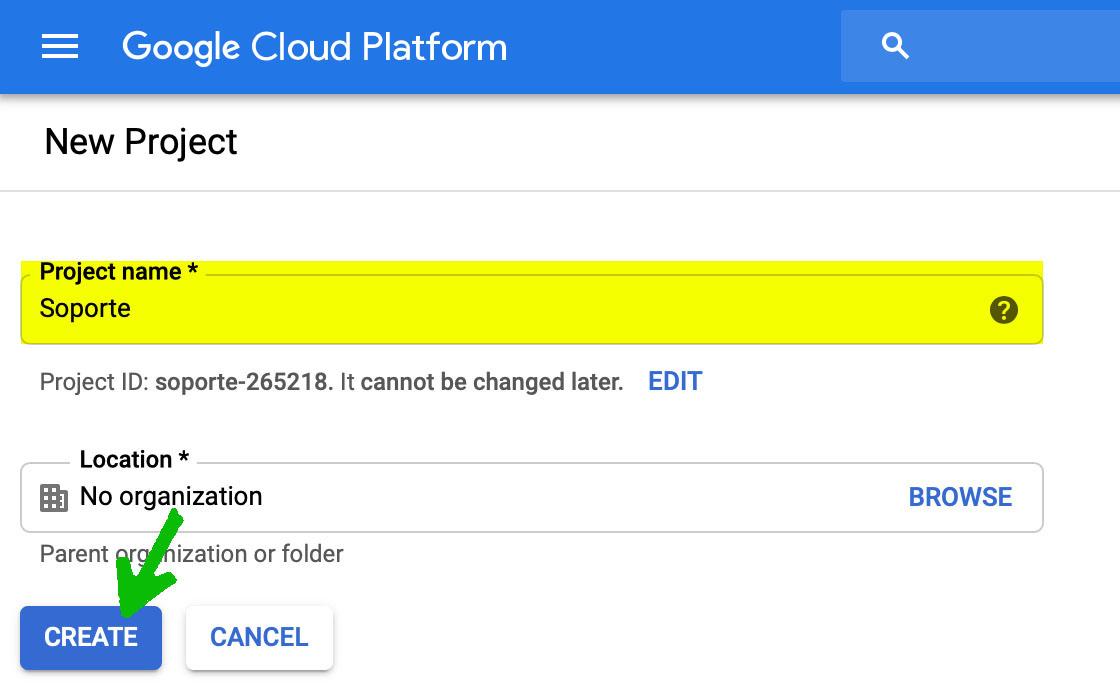
2. Enter a project name and click Create.
STEP 2. Enable Google Calendar API
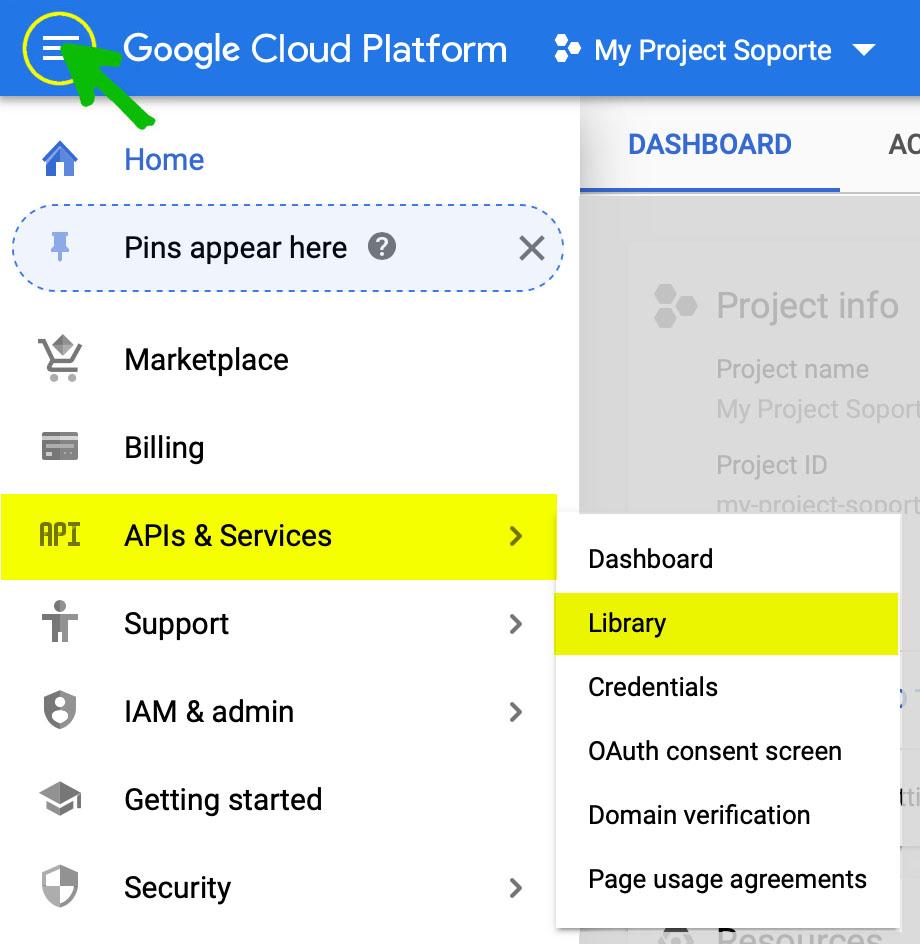
1. In the top-left corner of the GCP console, click Menu APIs & Services and then click Library.
2. Click the API name, in this case "Gmail". If you don't see the API, enter the API name in the search box.
And then click Enable.
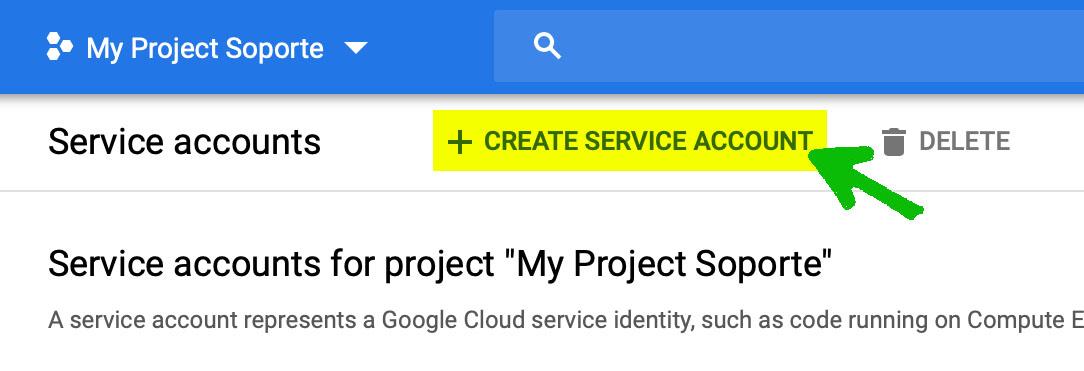
STEP 3. Create the Service Account
- In the top-left corner of the GCP console, click Menu. Then IAM & Admin and click Service Account.

Click on Create Service Account.
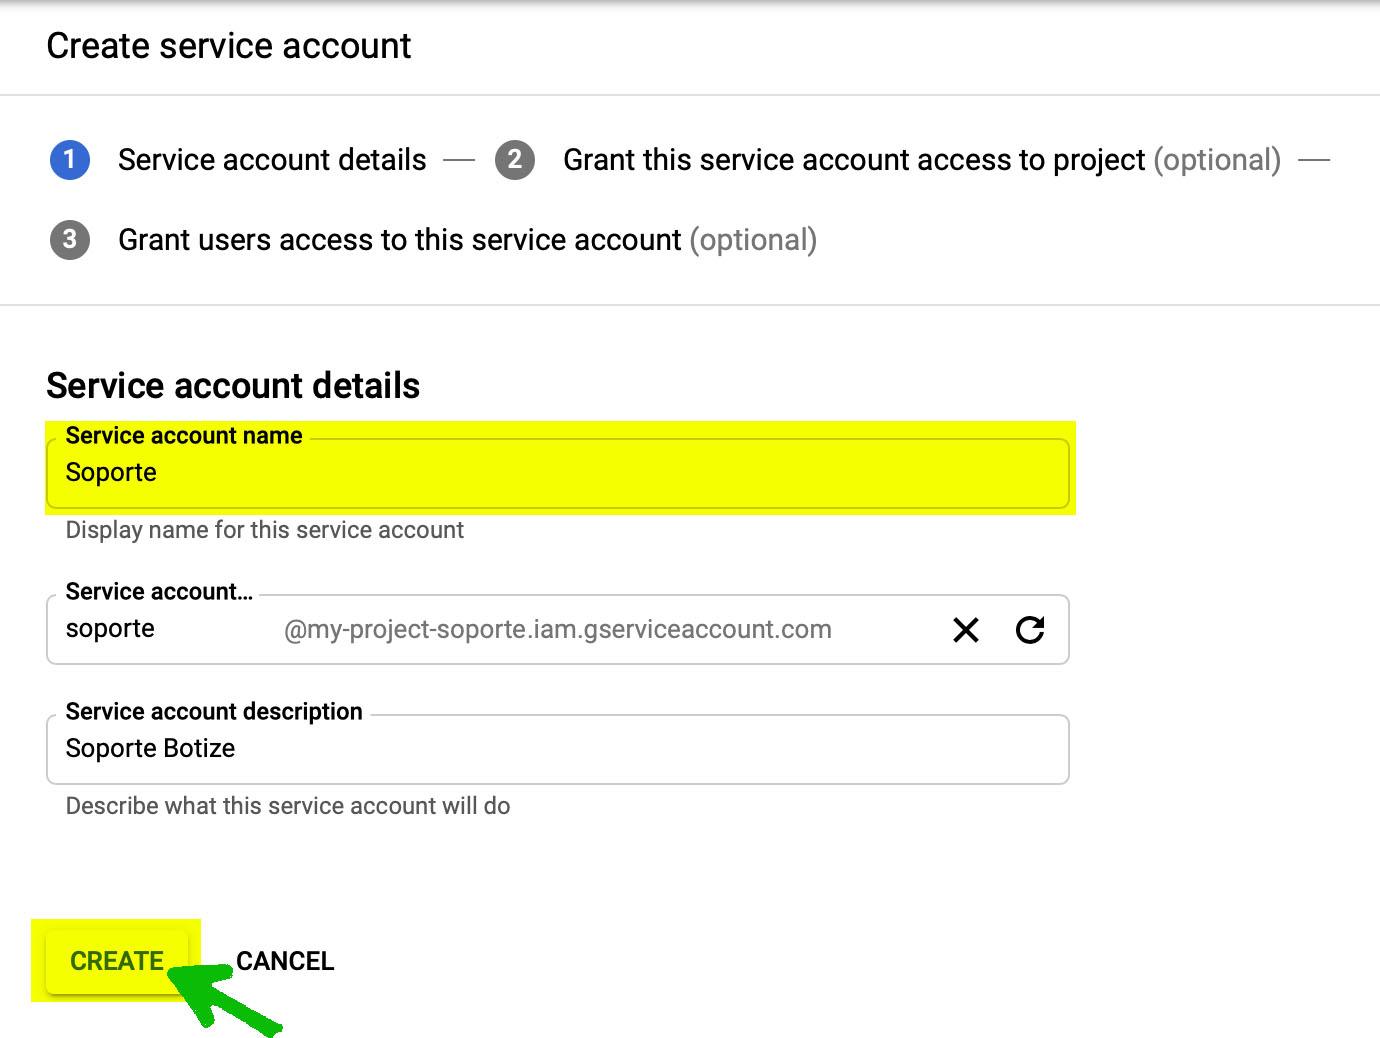
- In the Servicer Account name field, enter a name for the Service Account.
(Opcional) Enter a description of the Service Account. Then click Create.
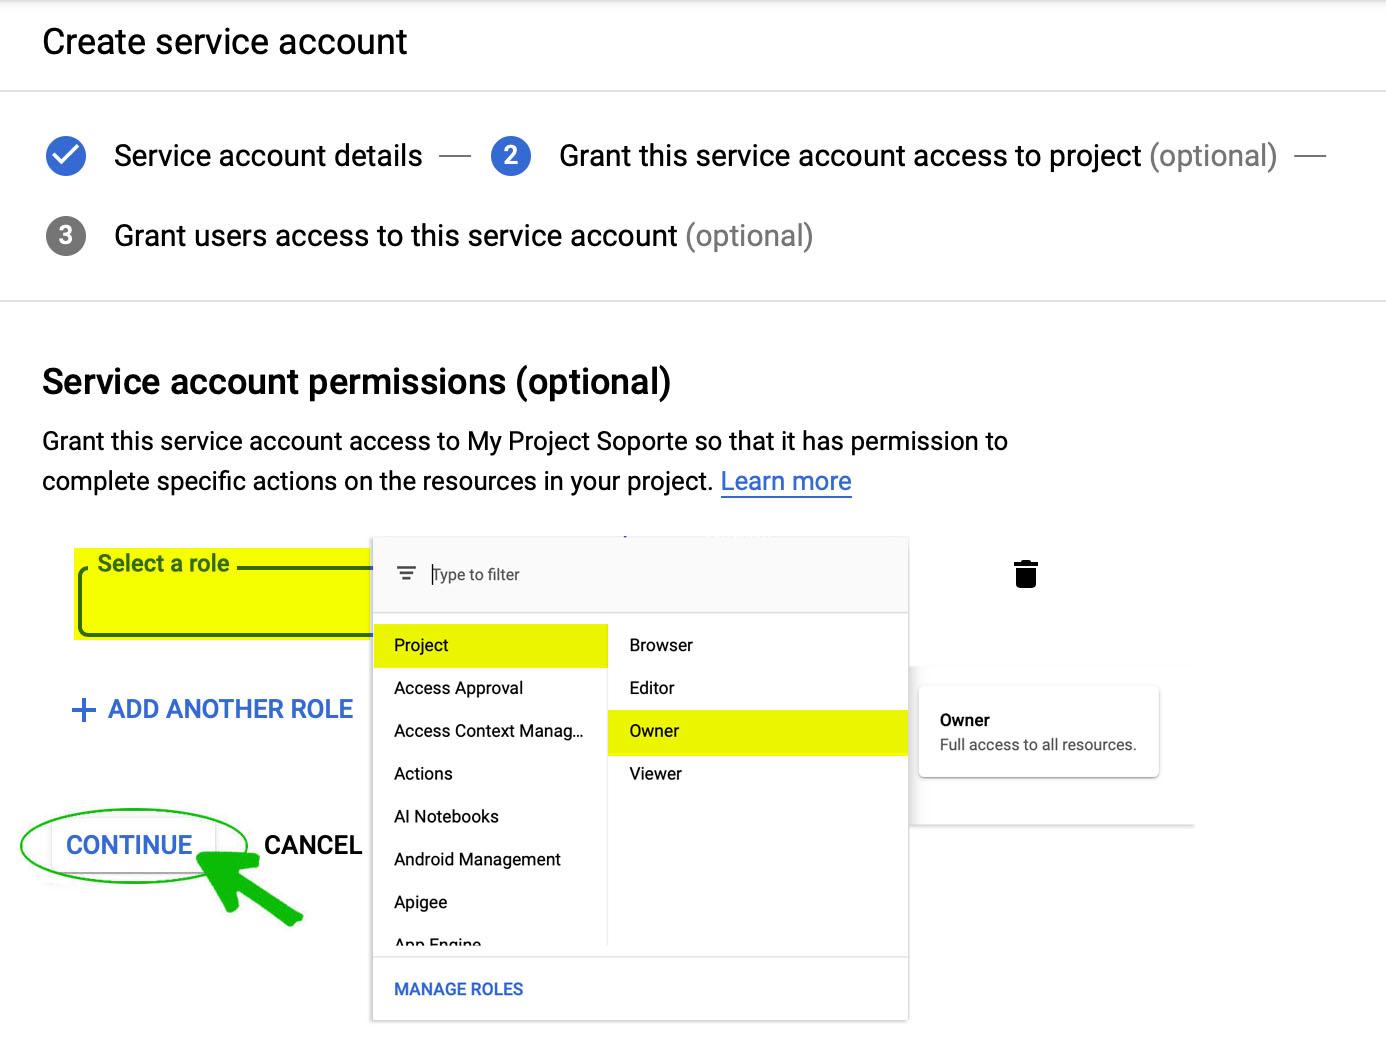
- (Opcional) Assign the role of Project viewer to the new account and click Continue.
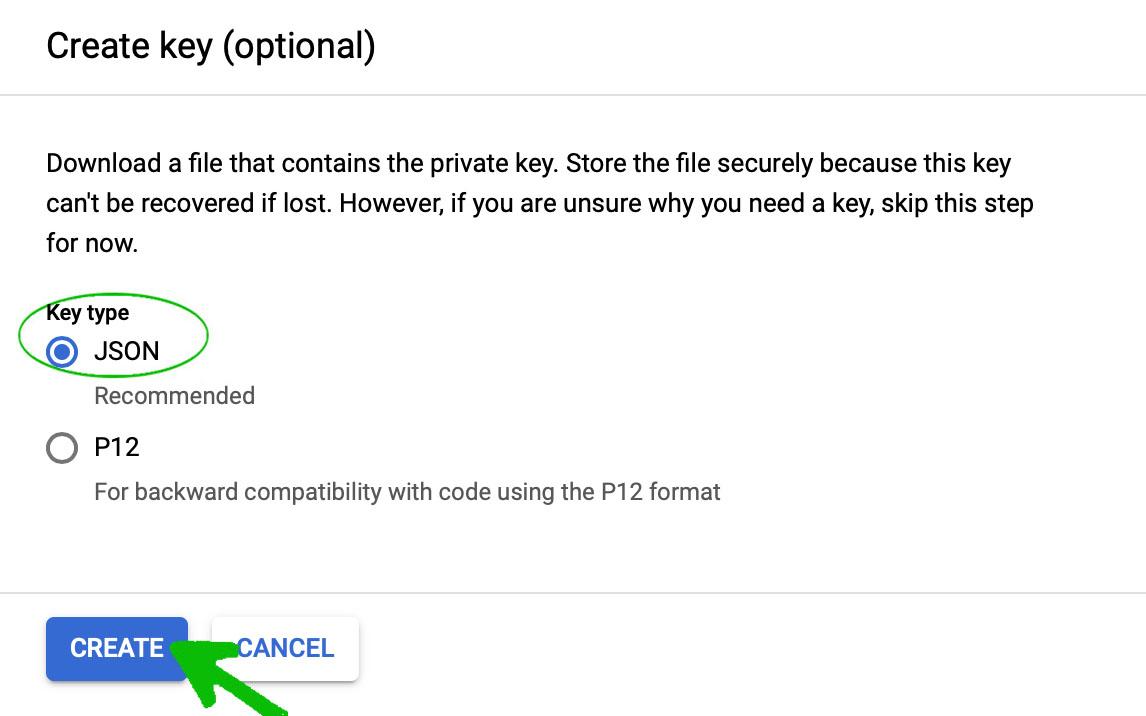
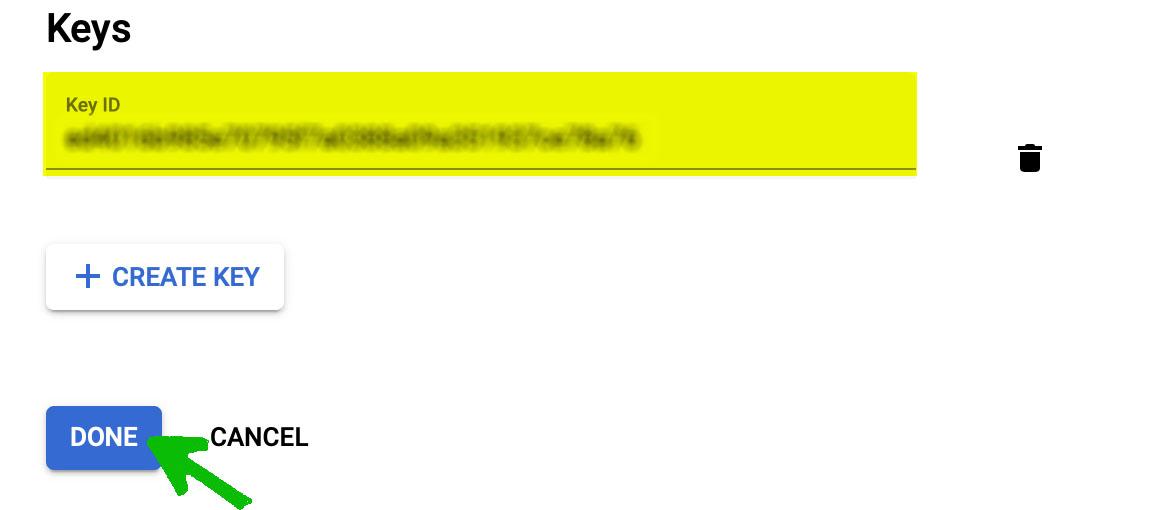
- Click Create Key.

- Ensure the key type is set to JSON and click Create.
- You´ll see a message that the service account JSON fie has been dowloaded to your computer. Make a note of the location and name of this file. Click Close.
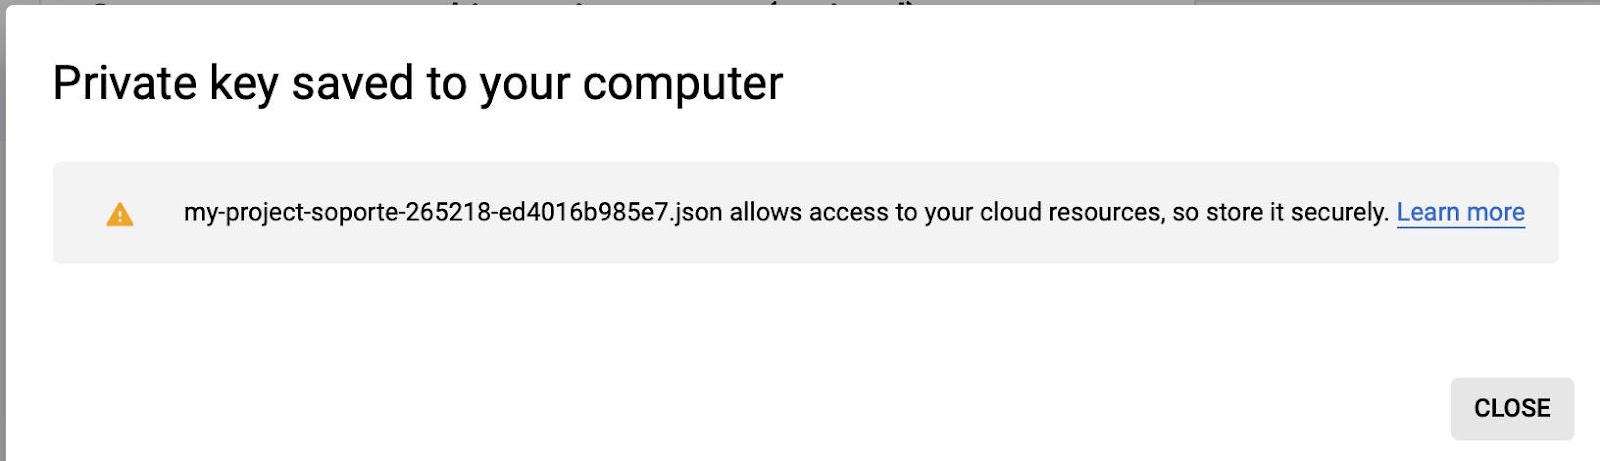
Then click Done.
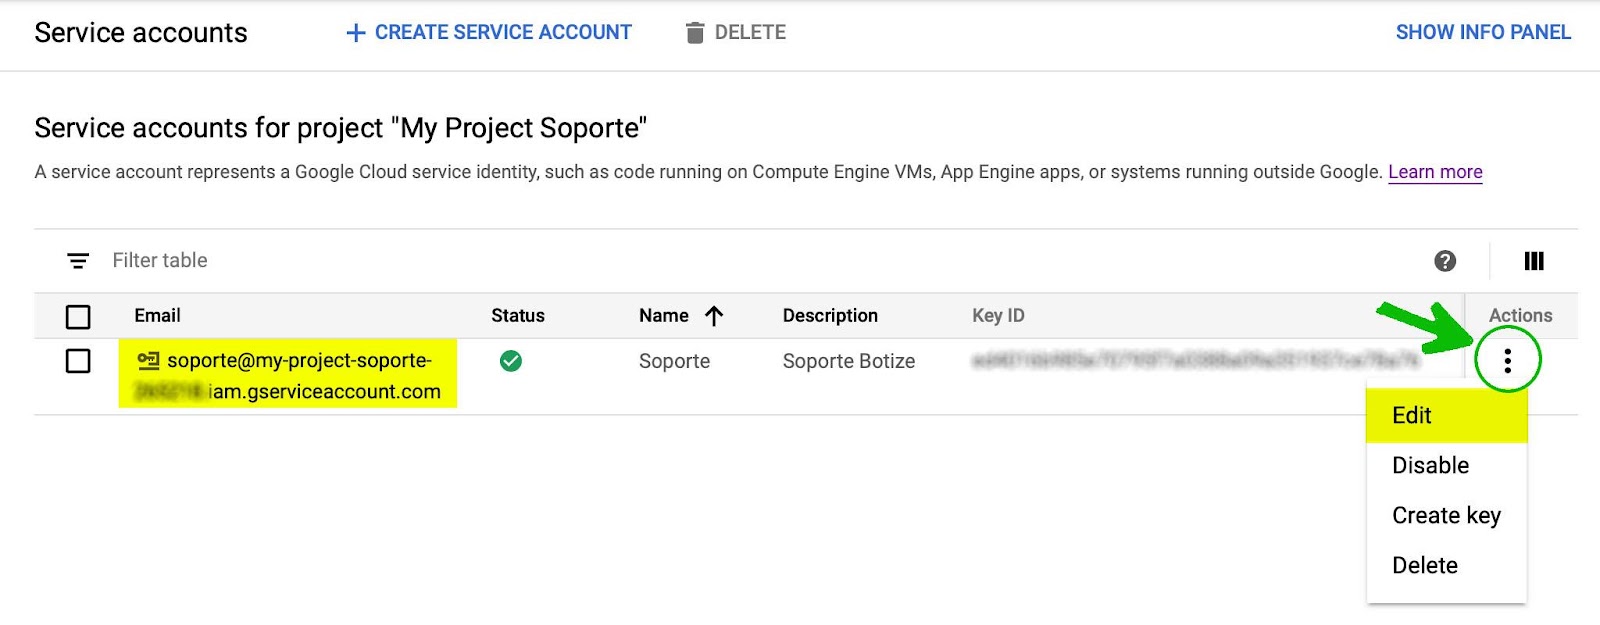
- In the list of service accounts, click the email address that relates to the service account you created and click Edit or click on the menu on your right and then edit.
- Click View Domain Wide Delegation Client ID and click Edit.
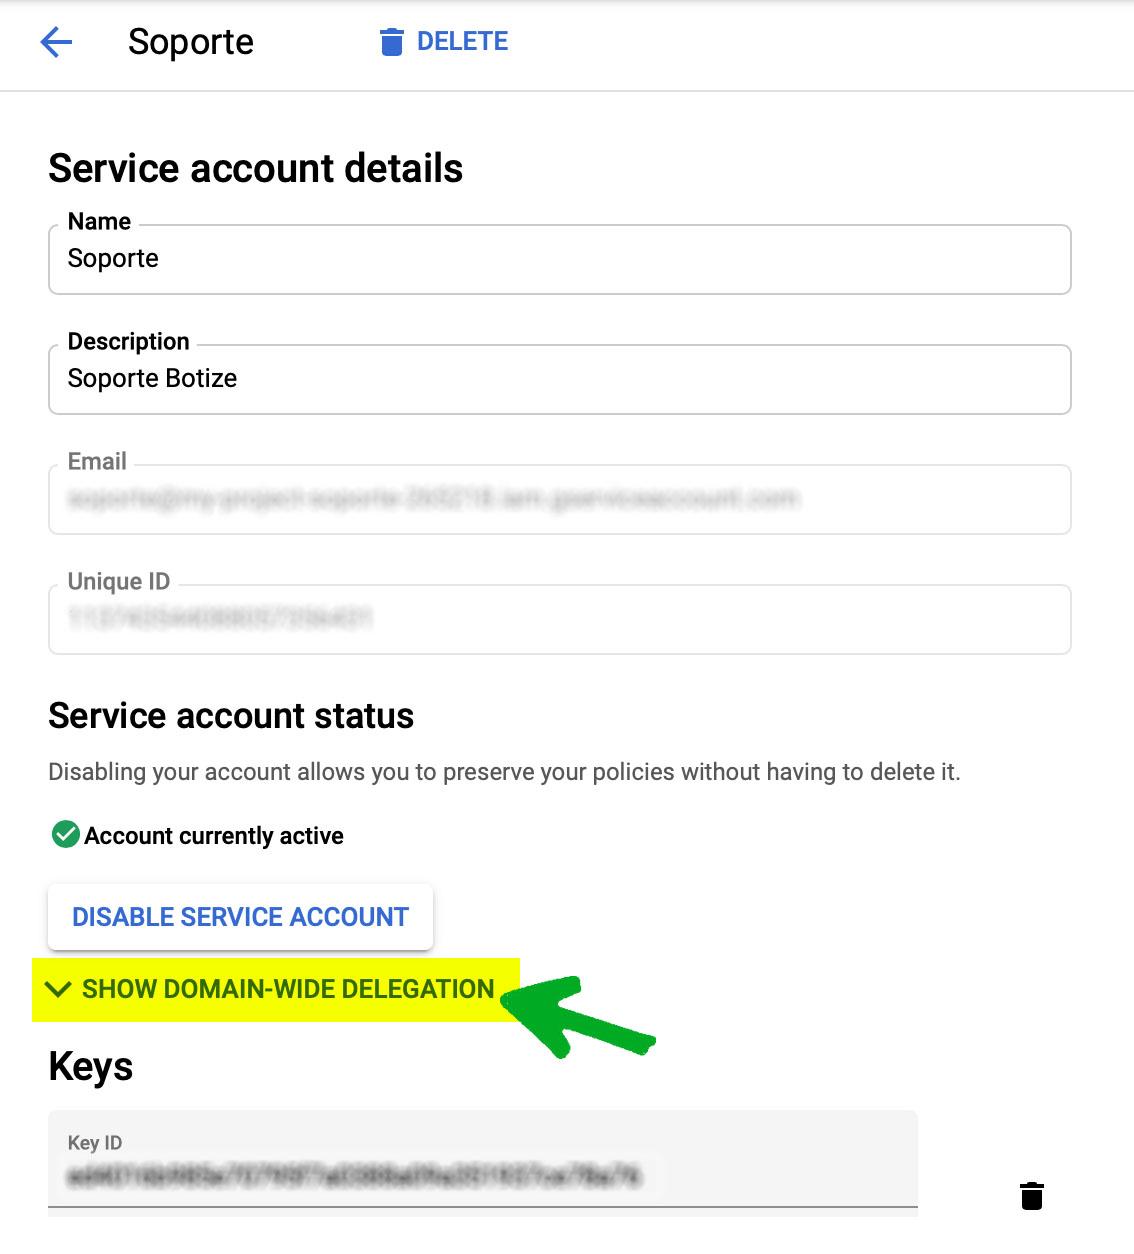
Check the option to Enable the Domain Wide Delegation.
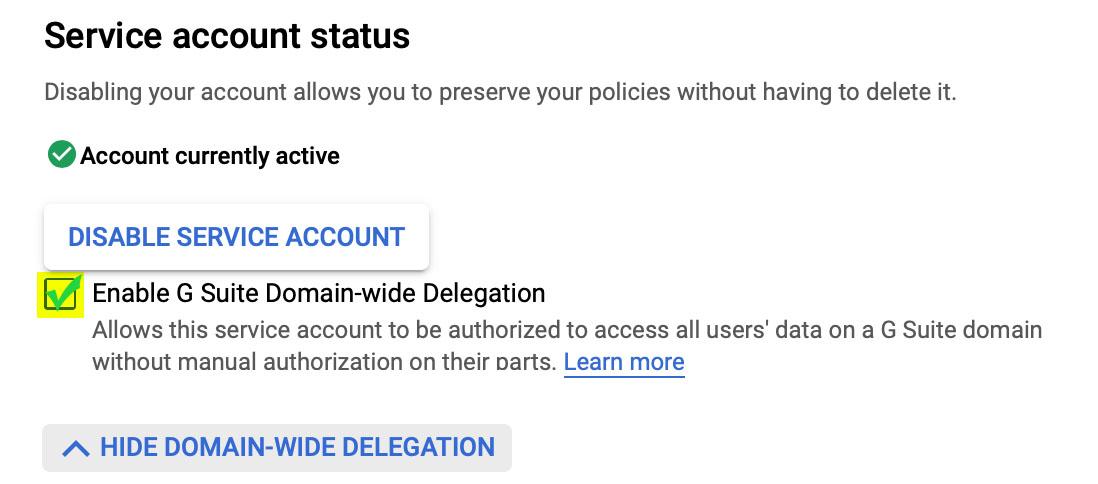
- In the Product name for the consent screen field, enter a product name.
- In the Email address field, use the default email address or assign a new email address.
- Click Save.


PASO 4. Give permissions to the email account you want to automate
- First of all you need to copy your Client Id, for this click on the Service Account section on the left menu.
- On the right you will see a table with the service account that you have already created. In the Domain Delegation column, click on the link that says See Client Id and copy the client Id that appears. We will need it below.
- Go to G Suite.
- Go to Security and then Advanced settings.
- Now click on the Manage API Client Access link.
- A form will be shown, where in Customer Name you have to paste the value the Customer Id that you copied previously.
- In the box "One or more API permissions" paste the following: https://www.googleapis.com/auth/gmail.readonly,https://www.googleapis.com/auth/gmail.send
- Click Authorize
- You have completed all the steps!