The following instructions will guide you through the process of creating breakout rooms in Zoom. If you find these instructions useful or you know someone who could benefit from them, you will find a shearable link at the bottom of the page. If you wish, you can download these instructions | |
Part 1. Enabling Breakout Rooms in your account You will only need to do this once in your account. Once you have set this up, you will need to follow the instructions in Part II every time you want to create breakout rooms. | |
1. | Log into your Zoom account in your preferred browser. You can do so by directing your browser to https://zoom.us/signin. |
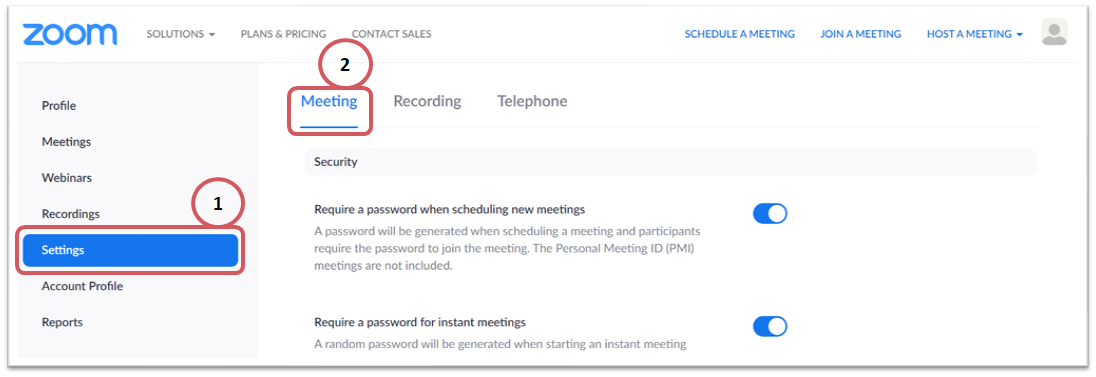
2. | On the left menu click on “Settings” and then, on the top bar, click on “Meeting”. |
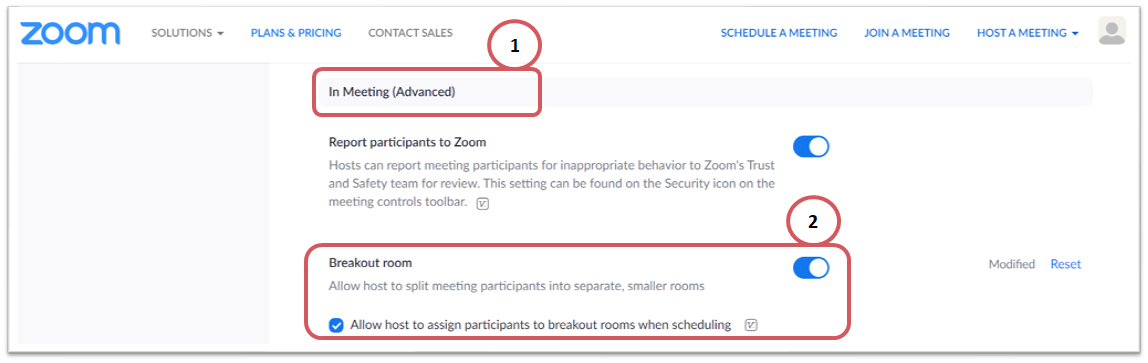
3. | Scroll about halfway down the page until you find the “In Meeting (Advanced)” section. Then, enable both options found under “Breakout room”. You’re done! You have now enabled the breakout room option in your account. |
Part 2. Creating Breakout Rooms from the Zoom desktop application You will need to follow these steps every time you want to create breakout rooms. Be sure you re logged into your account in the Zoom desktop application before following these steps. Then, start a new meeting or join a meeting. Note: You must be the meeting host in order to create a breakout room. | |
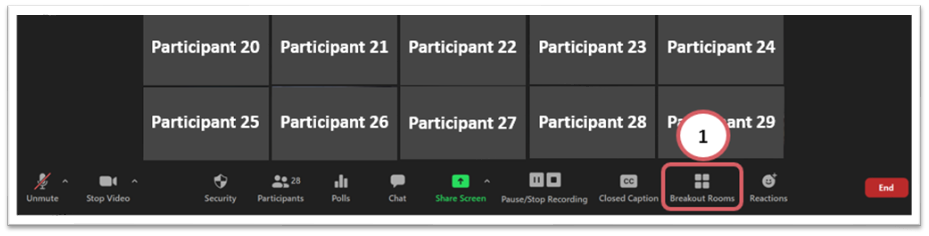
1. | When you’re ready, click on the “Breakout Rooms” option in the bottom bar of your Zoom meeting screen. |
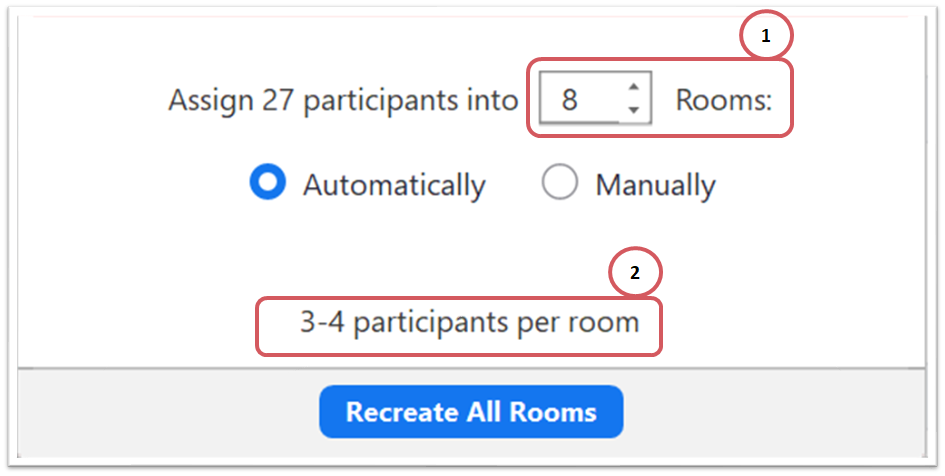
2. | Determine the number of rooms you will create. You can decide the number of groups you want to create or the number of participants per group. Fun trick: as you change the number of rooms, the system will automatically tell you the number of students per room (no need to do the numbers in your head!). |
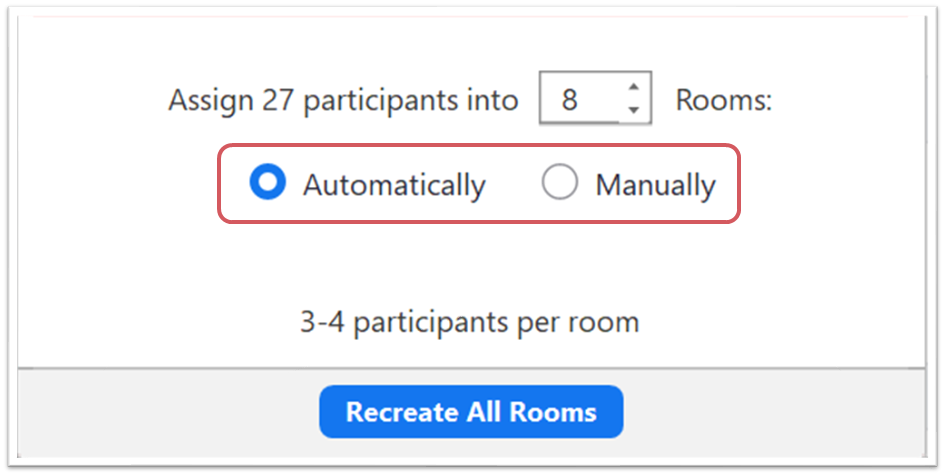
3. | Select “automatically” if you want participants to be assigned randomly or “manually” if you want to decide what room each person goes to. Unless you need a very specific group setup, we recommend automatically assigning participants. In the next screen, you will be able to review the groups and, if a group has a less-than-ideal setup, you can move and exchange participants. |
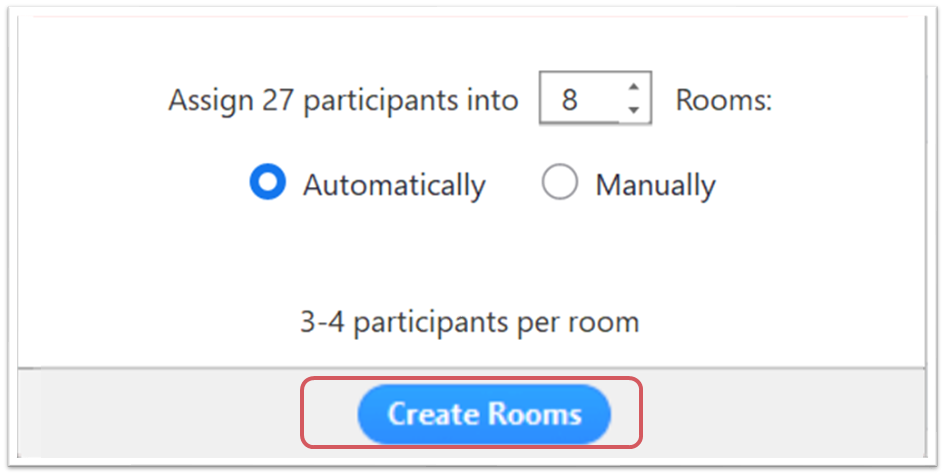
4. | Click on “Create all rooms” to create the rooms. Go ahead! Click the button! Don’t worry, you will be able to review your rooms on the next screen and make any changes you wish before the rooms actually open. |
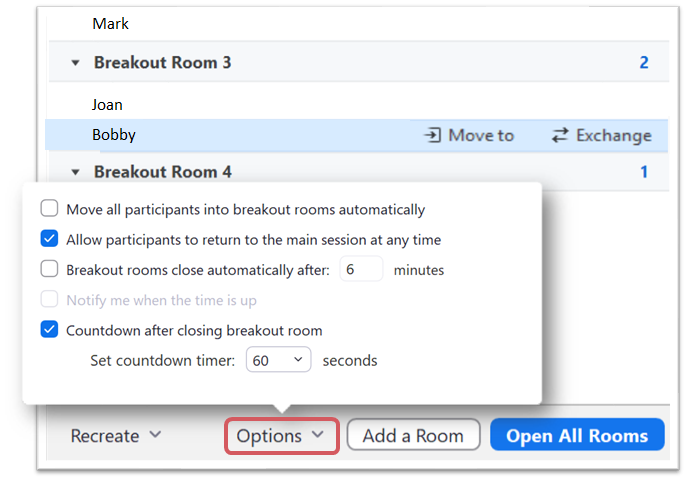
5. | Move students from one room to another or exchange students, as needed. If Bobby and Joan are both chatty and you don’t have much time available for the small group meeting, you can exchange Bobby with Mark. |
6. | Click on “Options” to define several additional settings. We like to have participants accept an invitation to go to a room because it lets us know who is present and paying attention, even if it takes longer for everyone to go to their rooms (if you want to be swift, go for the automatic move of participants). We also like to give people a 60-second countdown before the room closes. |
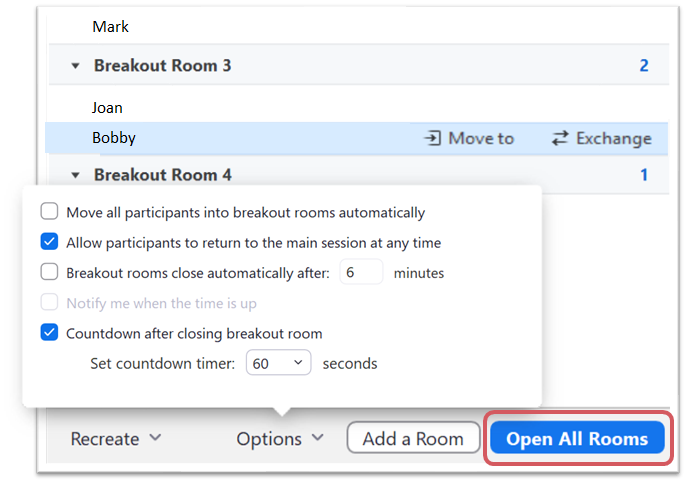
7. | Click on “Open All Rooms” to launch the rooms. Caution: Only do this when you’re ready! Once you click this button, the rooms will be launched and there is no going back (although you can continue to move and exchange participants when they are in separate rooms, but we don’t recommend it). |
Part 3. Managing Breakout Rooms There are many things you can do while participants are in Breakout Rooms. Here are a few things you can do, | |
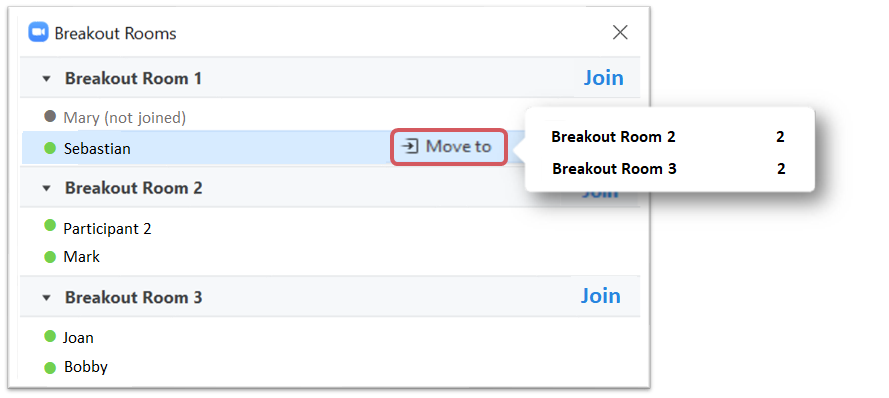
1. | Move participants to other rooms or exchange participants. We don’t recommend moving people from one room to another once the rooms have started unless it is purposeful. However, it seems Mary is not joining the rooms for some reason and Sebastian is all alone. Perpahs Sebastian should be moved to another room. |
2. | Click “Join” to join any Breakout Room. You can jump around from one room to another. |
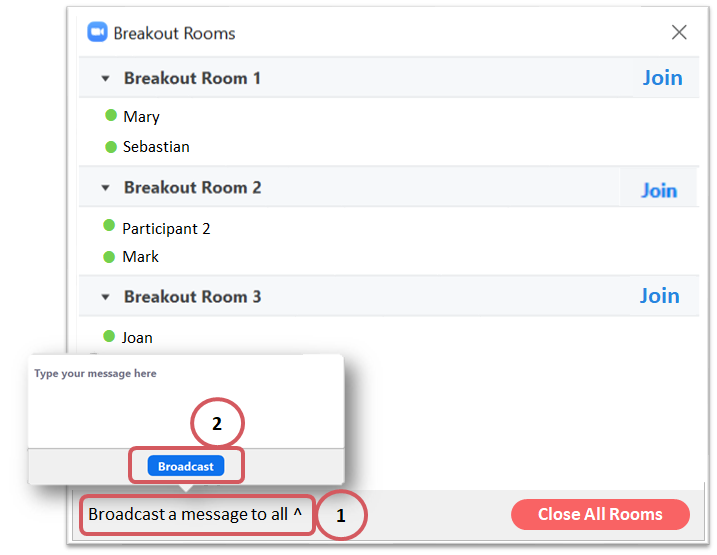
3. | Send a message to all rooms using the “Broadcast to all” option. Keep it short (e.g., one brief sentence)! The character limit per message is rather small. |
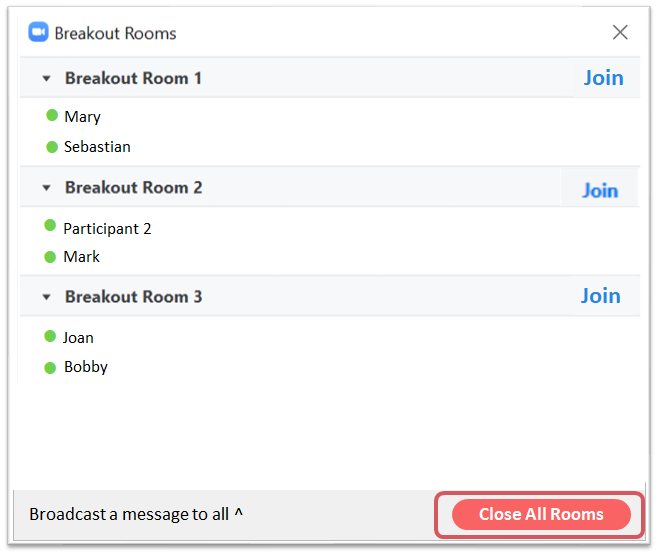
4. | When the time comes, “Close All Rooms”. If you set up a countdown for rooms to close, participants will see an announcement on their screens. Then, all breakout rooms will close and you will be back in the main meeting room. |
Author: Cynthia Borja Date of last update: 11-June-2020 | |
Did you like this resource? Share it widely! This resource is protected under a Creative Commons Attribution-NonCommercial 4.0 International (CC BY-NC 4.0) license. | |